Memecoins are starting to gain significant traction. Some of these tokens, such as Windowge98, Damonic Welleams, Wumbo, Spellkaster and $stik, have reached high prices and attracted many retail investors into the ecosystem. Now, you may be wondering how these meme tokens were launched. In this article, we will walk you through all the steps you need to follow in order to create your own memecoin project.
From creating the token smart contract (canister) to building a marketing website using Juno, and finally launching the token on ICPSwap, a major decentralized exchange (DEX) on ICP, we've got you covered.
We will also provide useful tips to ensure your memecoin project is successful. By the end of this article, you will have all the information needed to launch your token.
important
This article is for educational purposes only and is not financial advice of any form.
The Internet Computer (ICP) is a blockchain-based platform that aims to create a new type of internet, one that is decentralized, secure, and scalable. Developed, among others, by the DFINITY Foundation, the Internet Computer is designed to serve as a global public compute infrastructure, allowing developers to build and deploy decentralized applications (dApps) and services directly on the blockchain. Learn more about ICP
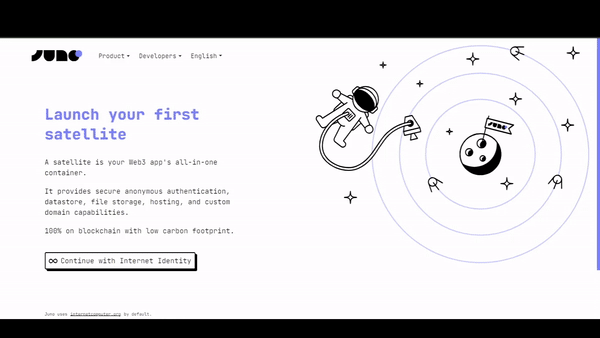
Juno is a blockchain-as-a-service (“blockchainless”) platform that empowers developers to build decentralized apps efficiently. Similar to Web2 cloud service platforms but with significant improvements, it offers a comprehensive toolkit to scaffold secure and efficient projects running on the blockchain.
In short, Juno is the Google Firebase alternative for Web3.
There are simpler ways to launch your own token that do not involve scripting, such as using no-code platforms like ICTO, ICPEx or ICPI.
However, since Juno is dedicated to providing developers with full ownership without compromise, this tutorial showcases an approach that aligns with our core values.
If you prefer to use one of those services, that's cool. Some of those also share these values; we just suggest you do your own research before making a decision.
And who knows, maybe in the future, Juno itself will make launching ledgers to the moon easy too! 😉
To deploy a ledger for your token proceed as following:
Make sure you have the dfx CLI installed on your machine. If not, follow this guide to complete the installation.
Creating a canister requires cycles, which measure and pay for resources like memory, storage, and compute power. Follow this guide to load cycles on your machine for deploying your ledger.
The following steps assume that you have cycles on your machine
On your computer, make an empty folder and name it myToken, and open it in your favorite editor
Create a file inside the folder and name it dfx.jsonpaste the code below
In this script, we define our token's name, symbol, transfer fee, and initial supply. Adjust these settings to match your tokenomics and token information details. For our token, we are premining 100 million tokens.
The script also specifies default settings for the token and sets up identities for minting and archiving.
note
Ensure you switch back to the identity that contains the cycles on your machine before running the commands below.
Once the file saved, run the command below in your terminal to deploy the token canister on the network:
./deploy.sh
If all the previous steps are successful, you should get a link in this format https://a4gq6-oaaaa-aaaab-qaa4q-cai.raw.icp0.io/?id=<TOKEN-CANISTER-ID> where TOKEN-CANISTER-ID is the id of your token ledger that was deployed.
All the premined tokens are now held by the principal address of the default identity. You can transfer these to an external wallet like plug to ease with the transfer process since using the command line to distribute the tokens is a little bit cumbersome.
Learn more about creating token canisters
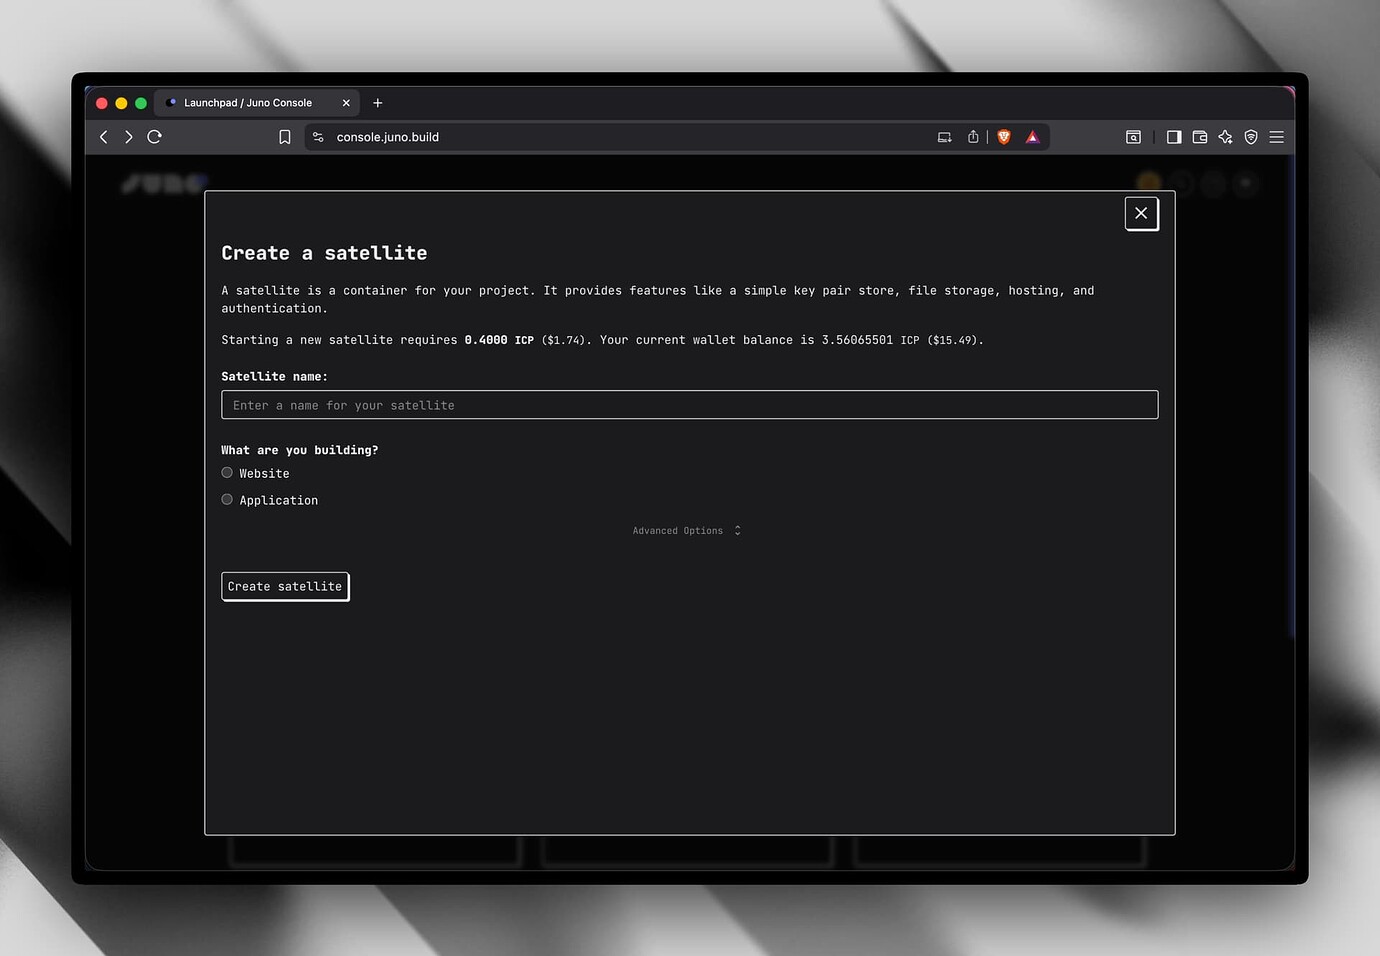
The next step is to set up a marketing website for your project.
Select no to configure the local development emurator
Select yes to install the dependencies
Select yes to install juno's CLI tool. Juno CLI will help us to deploy our project in the satellite.
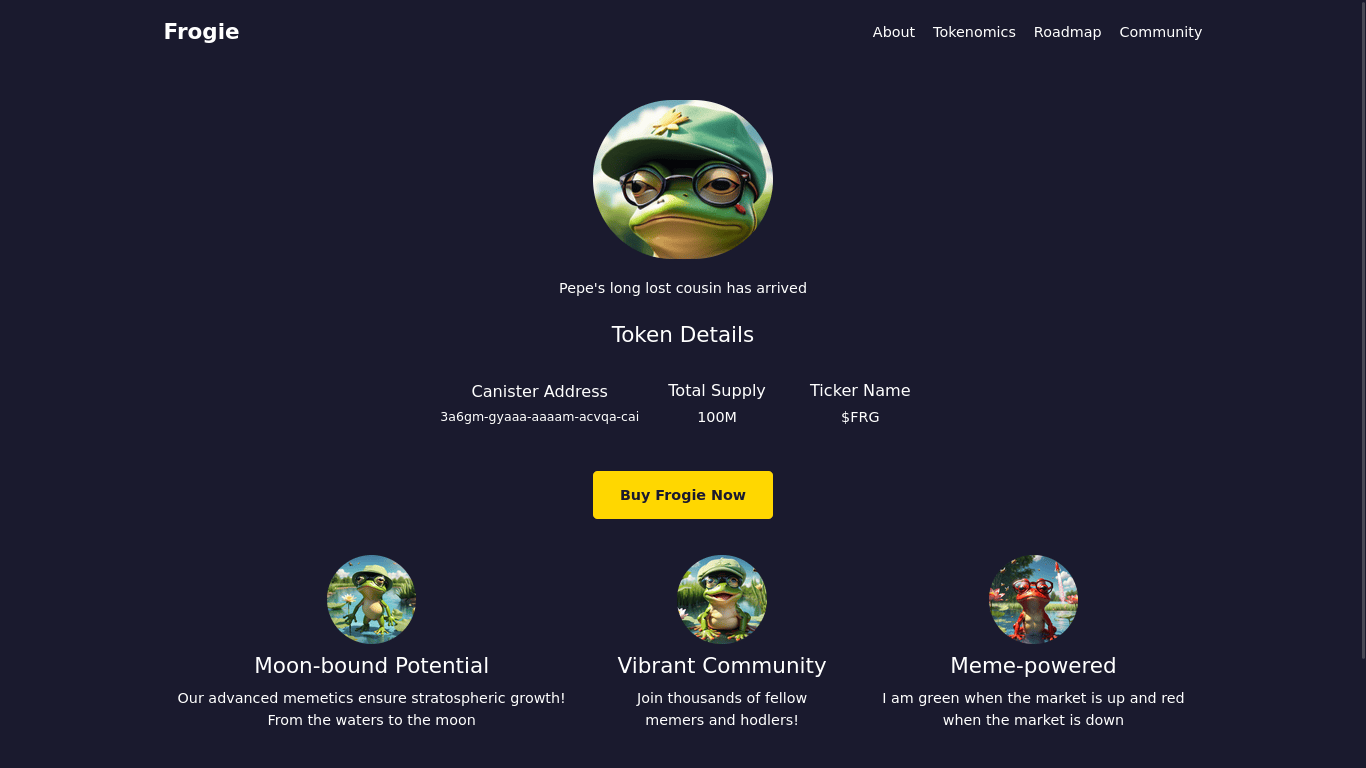
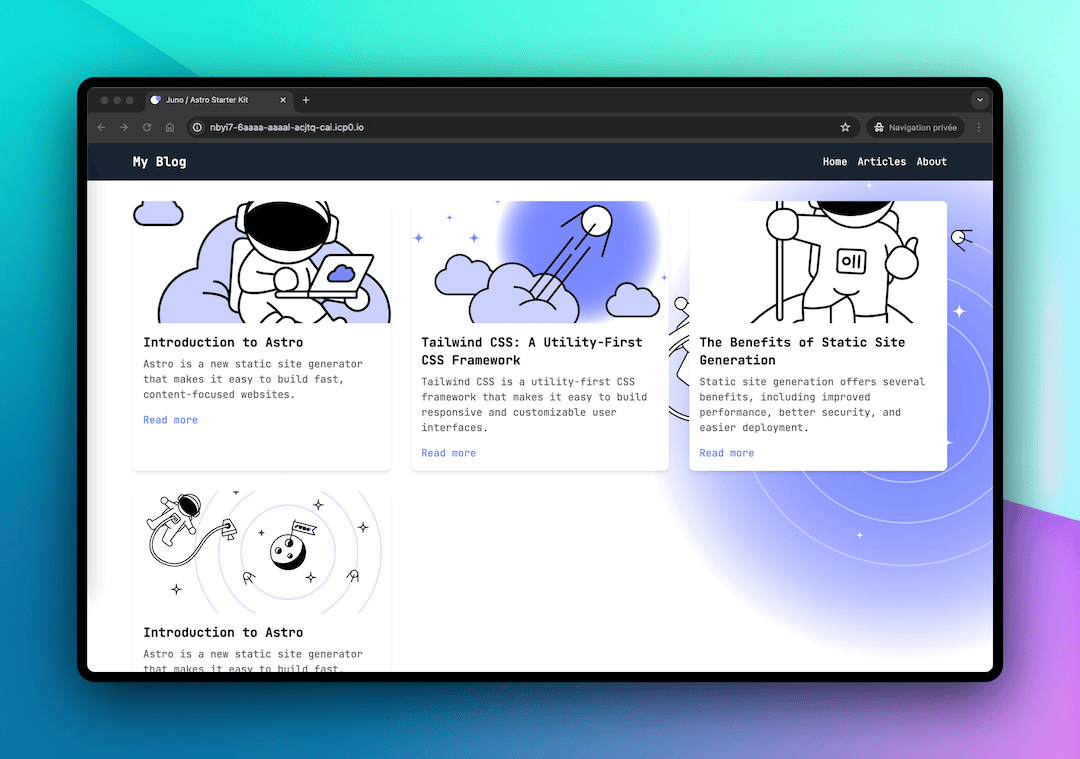
Navigate to the project folder myWebsite and open it in your favorite code editor. If every previous step is successfull, running npm run dev in the terminal will open the project in the browser and you should have something similar to this.
In the above code, we created a simple website to display the logo of our token, as well as the name,symbol and total supply of the token. There is also a button that allows the user to but our token from an exchange where it is listed.
Edit the code above to display the information of your token including the name, symbol, total supply, and logo.
Now that we connected our project to the satellite, we can compile and deploy the website.
npm run build
The above command compiles our website and outputs the compiled files in the dist folder
juno deploy
This will deploy our compiled files to the satellite that we connected linked our website to.
At this stage, if all the previous steps are successful, the command will output a link which is in this format https://<SATELLITE_ID>.icp0.io where SATELLITE_ID is the id of the satellite that we connected our project to.
tip
Running juno open in your terminal opens your project in your favorite browser.
Opening the link in the browser, you should have something like this below
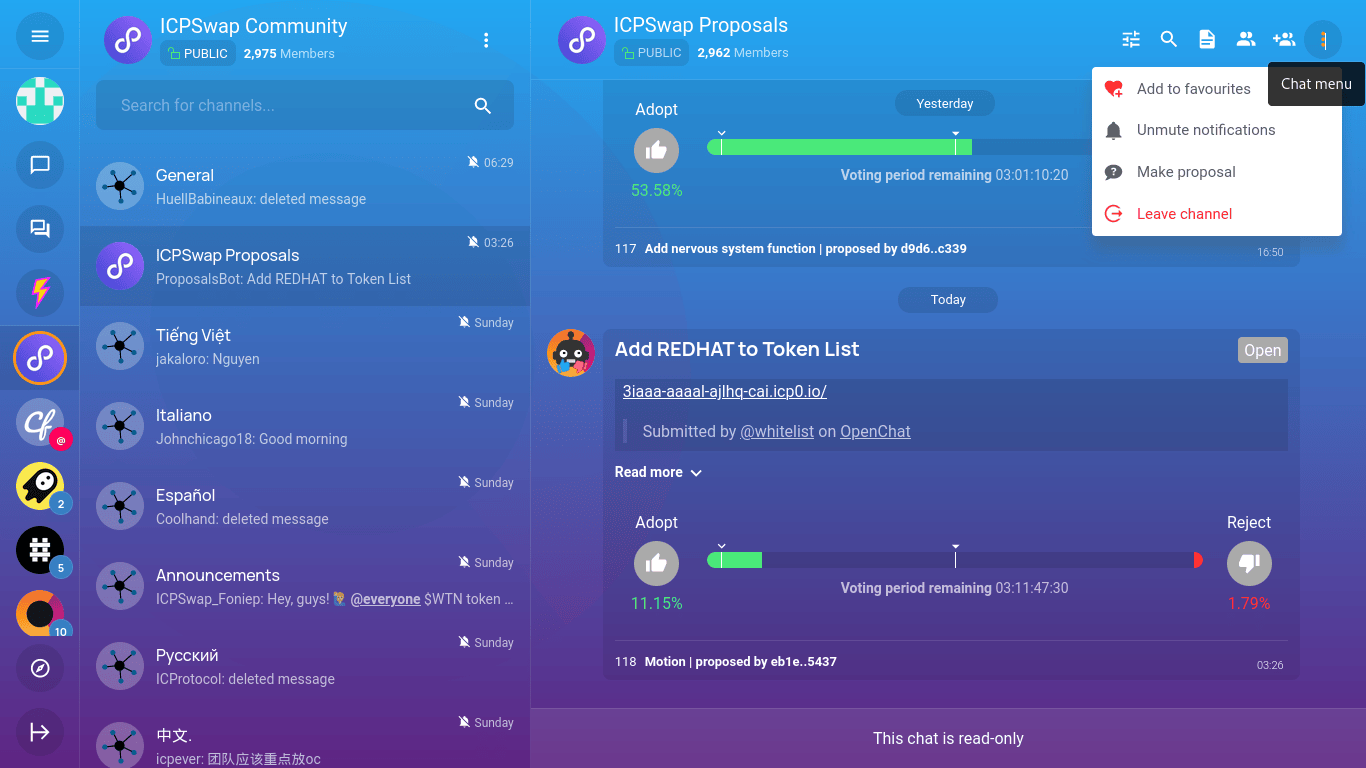
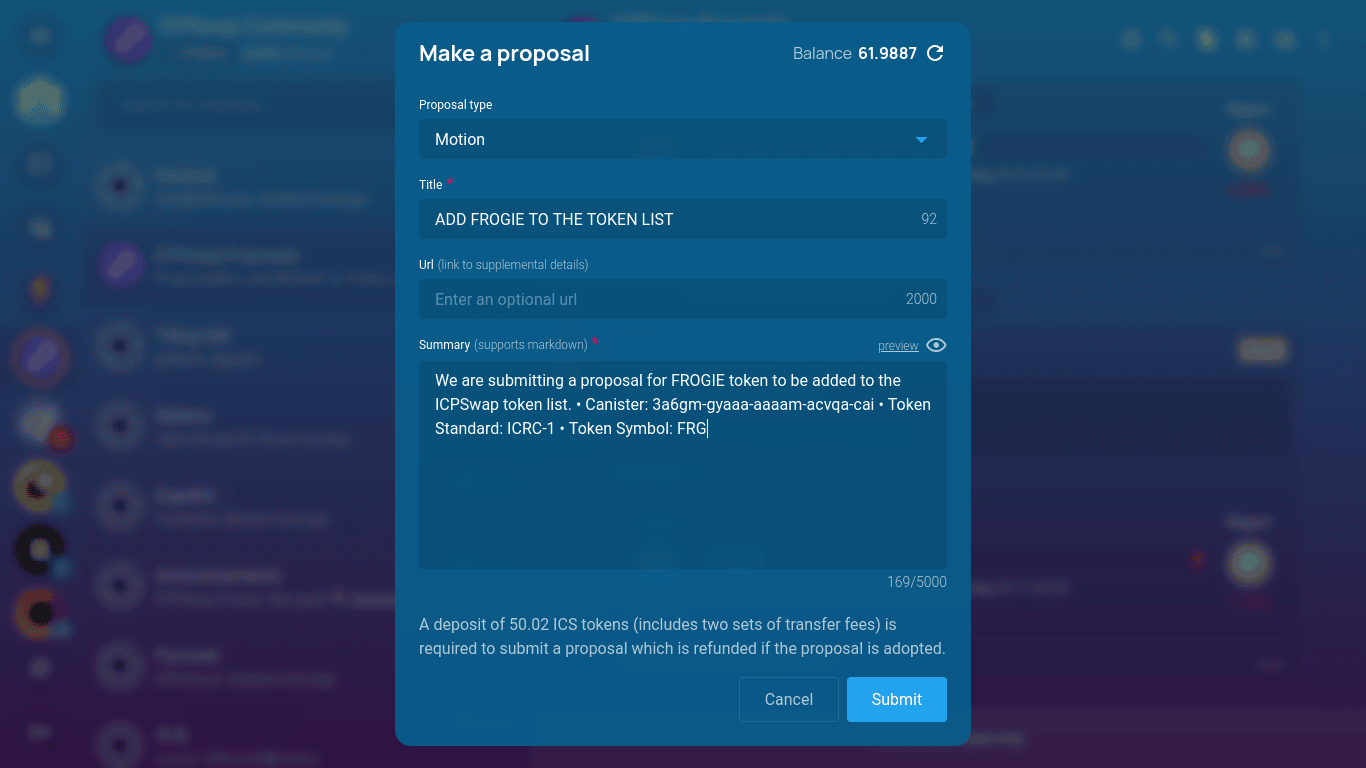
In this section, we will look at how to list our newly created token on ICPSwap.
ICPSwap is a decentralized exchange that facilitates token trading and swapping by allowing tokens to be listed and liquidity pools to be created for different token pairs.
And because ICPSwap is a decentralized autonomous organization (DAO) controlled by the community members, you need to submit a proposal for your token to be added on the exchange. This proposal will be voted on by the community members. If the proposal passes, the token will be listed on this exchange.
We will create a proposal to add our token on ICPSwap in the following steps.
Click on te three dots in the right corner and select make proposal
Select MOTION as the proposal type
Add a descriptive title, something like "ADD FROGIE TO THE TOKEN LIST"
In the summary section,add all the details about your token forexample the token canister address, social media handles and any other information you feel will help the voter to understand more about your token
Once your have filled all the fields, click submit and the proposal will be submitted.
NOTE: You will be charged a fee of 50 ICS for this service, therefore ensure you have enough ICS balance before you perform this step.
The voting duration for proposals on the ICPSwap platform is typically three days. If a proposal passes during this voting period, your token will be listed on the exchange and will be tradable.
Once your token is available for trading, you can update the link on the Buy Frogie Now button to redirect the user to the exchange from where they can buy the token.
note
You can also use proposals.network as an alternative to submit a proposal to any SNS project.
If you have reached this step without any errors, congratulations, you have created your first meme coin project. 🥳
Now you can start marketing to attract more users and holders. Good luck! 🤞
The first step to creating a successful meme coin is finding a unique topic that resonates with people. Your concept should be relatable, funny or nostalgic. Capture the essence of internet culture with a catchy name and logo that embodies the humor and appeal of your chosen meme.
Most successful meme coin projects hire specialized crypto influencer marketing teams with extensive networks. Partner with online personalities who like memes or crypto and have them talk about your coin to their followers.
In this article, we have covered everything you need to launch a successful memecoin project, from creating the token canister, to creating a marketing website using Juno and listing the token on ICPSwap.
This article is for educational purposes only and is not financial advice of any form. Do Your Own Research (DYOR) if you want to invest in memecoins.
👋
Stay connected with Juno by following us on Twitter to keep up with our latest updates.
And if you made it this far, we’d love to have you join the Juno community on Discord. 😉
Beyond cryptocurrencies, Blockchain technology offers tools to build secure, transparent applications fully controlled by the user. Building a blog website on the blockchain allows the user to establish a censorship resistant space where they retain full ownership of their content and data.
In this article, we will look at how to create and host your blog website on the blockchain using Juno. Juno is an open-source Blockchain-as-a-service platform that offers a fully decentralized and secure infrastructure for your applications. This article will cover setting up a boilerplate project, configuring the hosting, developing the code for your blog and deploying the project on the blockchain using some of Juno's super powers.
By the end of this article, you will have an understanding of how Juno works, how to host your websites on the blockchain and how to automate the different tasks using Github Actions.
Juno works just like traditional serverless platforms such as Google Firebase or AWS Amplify, but with one key difference: everything on Juno runs on the blockchain. This means that you get a fully decentralized and secure infrastructure for your applications, which is pretty cool if you ask me.
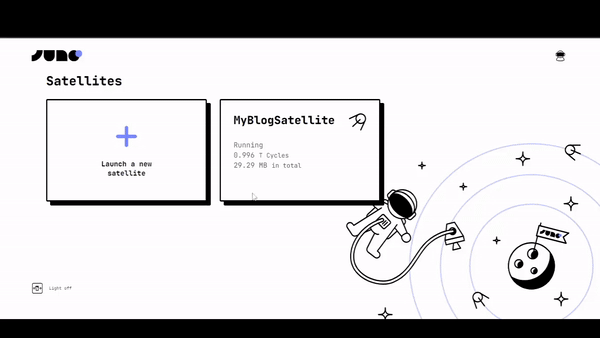
Behind the scenes, Juno uses the Internet Computer blockchain network and infrastructure to launch what we call a “Satellite” for each project you build. A Satellite is essentially a smart contract on steroids that contains your entire app. From its assets provided on the web (such as JavaScript, HTML, and image files) to its state saved in a super simple database, file storage, and authentication, each Satellite controlled solely by you contains everything it needs to run smoothly.
The Internet Computer (ICP) is a blockchain-based platform that aims to create a new type of internet, one that is decentralized, secure, and scalable. Developed, among others, by the DFINITY Foundation, the Internet Computer is designed to serve as a global public compute infrastructure, allowing developers to build and deploy decentralized applications (dApps) and services directly on the blockchain.
Unlike traditional blockchains, the Internet Computer uses a unique consensus mechanism called Threshold Relay, which allows it to achieve high transaction throughput and low latency. The platform is also designed to be highly scalable, with the ability to add more nodes and increase its computing power as demand grows. This makes the Internet Computer a promising platform for building a wide range of decentralized applications, from social media and e-commerce to finance and cloud computing. Learn more about ICP
This is a secure and decentralized blog website. The frontend is build with Astro, which is a modern, flexible web framework focused on building fast, content-rich websites with minimal JavaScript. Here is what you will build by the end of thi article:
Select no to configure the local development emurator
Select yes to install the dependencies
Select yes to install juno's CLI tool. Juno CLI will help us to deploy our project in the satellite.
Navigate to the project folder myBlog and open it in your favorite code editor.
If every previous step is successfull, running npm run dev will open the project in your browser and you should have something similar to this.
The above code displays a navbar that has three tabs Home,Articles, and About. It also displays information about the different articles from our sample article data.
To keep the satellite operational, the developer pays a small fee that is used to purchase the necessary cycles for the satellite's storage and computation requirements. Learn more about pricing
We need to link our project to the satellite. follow the steps below
In the project terminal, run the command juno init and follow the prompts
Select yes to login and authorize the terminal to access your satellite in your browser
Select myBlogSatellite as the satellite to connect the project to
Select dist as the location of the compiled app files
Select TypeScript as the configuration file format.
If the above step is successful, a new file juno.config.ts
will be added at the root of our project folder. It contains the configuration necessary for our poject to connect to the satellite. You need this file if your project is to be deployed successfully to the satellite. Learn more about this configuration
Now that we connected our project to the satellite, we have to compile and deploy project to the satellite
npm run build
The above command compiles our project and outputs the compiled files in the dist folder
juno deploy
This will deploy our compiled files to the satellite that we connected linked our project to.
At this stage, if all the previous steps are successful, juno deploy command will output a link whixh is in this format https://<SATELLITE_ID>.icp0.io where SATELLITE_ID is the id of the satellite that we connected our project to.
tip
Running juno open in your terminal opens your project in your favorite browser.
Opening the link in the browser, you should have something like this below
If you have reached this step, well done, you have successfully deployed your first blog website on the blockchain using Juno.
If you noticed in the previous steps, every time we make changes to our project, we have to manually run the commands that compile and deploy our code to the satellite. But in this section, we will learn how to automate these tasks using Gihtub Actions so that whenever we make changes to our project, these changes are automatically deployed to oour satellite
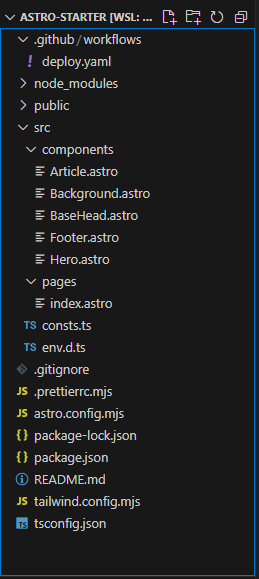
In our project, we have a folder .github which contains the file deploy.yml. This file has all the configurations required to setup Github Actions in our project. This folder must be present in your poject to successfully setup Github Actions. You can add it manually if you dont have it in your project. Below are the contents of the deploy.yaml file
To set up Github Actions, we need a secret token that uniquely identifies our satellite. Github needs this secret token to associate our repo to the satellite.
Visit juno console, and select myBlogSatellite satellite.
Under the controllers tab, click add controller
Select 'Genetate new controller' and select 'Read-write' as the scope.
Click submit.
Once the new controller is generated, it will provide a secret token, copy and store the secret token.
The above code established the required connection to our remote Github repo, and pushes all our project code to that repo.Now every time we make changes to our project, all we have to do is push these changes to our github repo and they will be deployed to our satellite automatically. Learn more about setting up Github Actions with Juno
Now that we have successfully hosted our blog website on the blockchain, you can go ahead and add more articles to the blog to showcase your skills. You can also add more features on the website to make it more robust.
In this article, we have looked at how to create a boilerplate template project using juno, how to create a satellite from the juno console, writing code for our project, how to connect the satellite to the our local project, deploying our project to the satellite and configuring Github Actions to automate compiling and deployment tasks for our project
👋
Stay connected with Juno by following us on Twitter to keep up with our latest updates.
And if you made it this far, we’d love to have you join the Juno community on Discord. 😉
Deploying a static site fully on Web3 is possible thanks to the Internet Computer and made easy with the help of Juno. It’s just as easy as it is on the good old Web 2.0, but without the limitations of trust-based or centralized approaches that may not be as beloved.