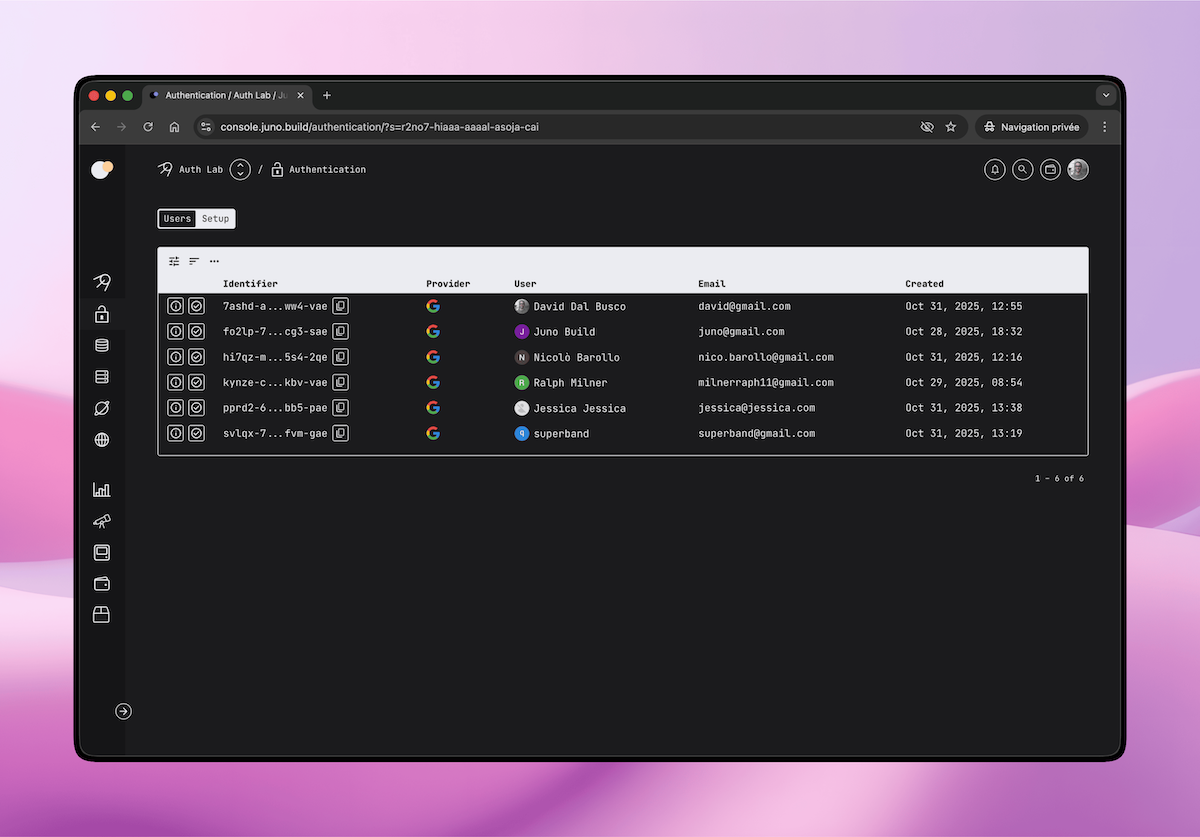
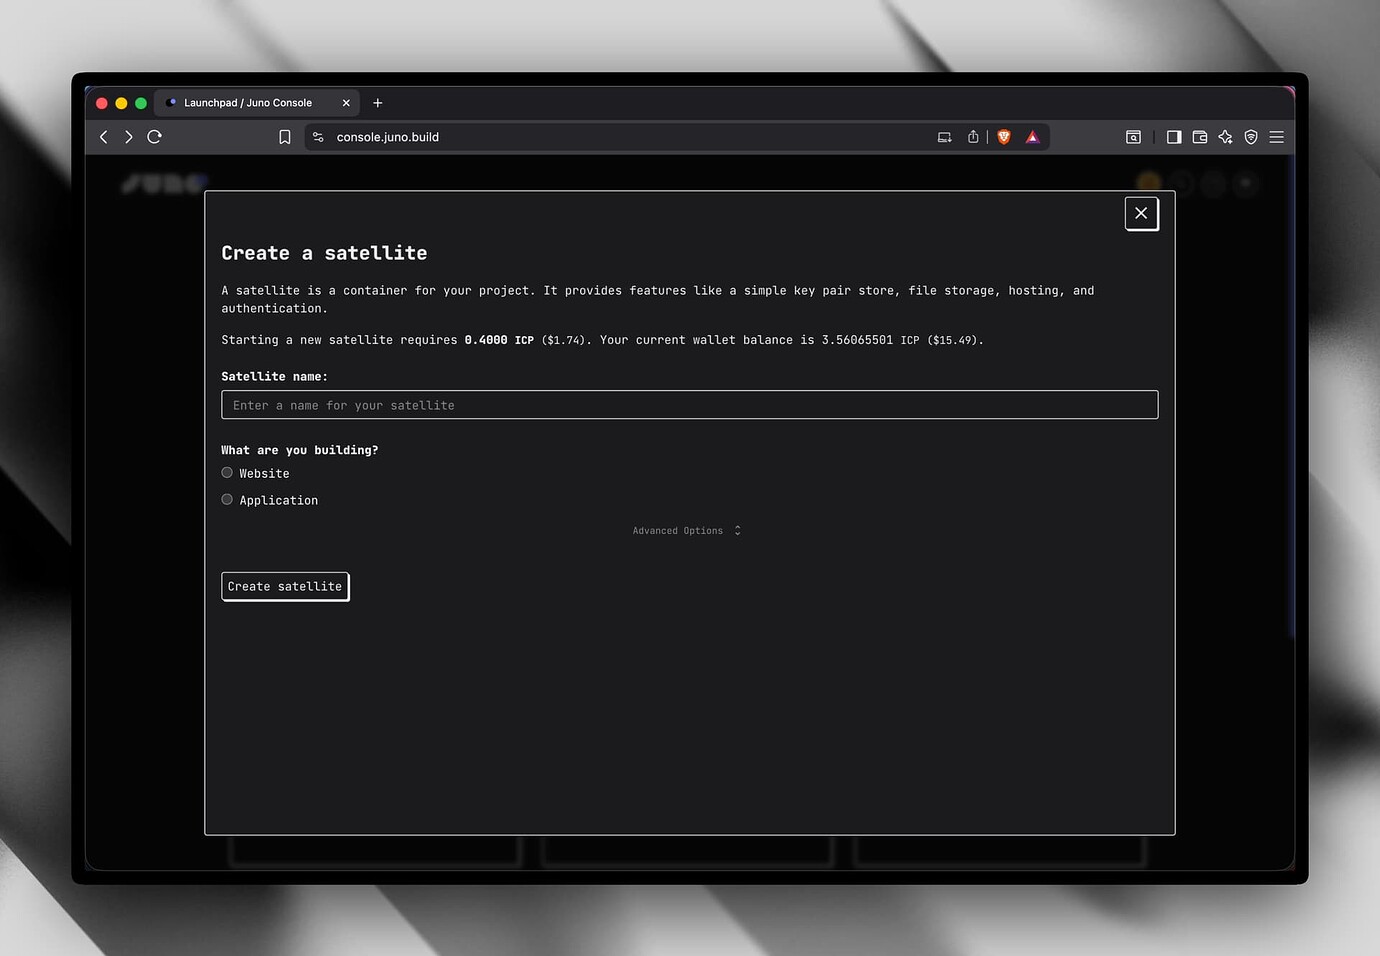
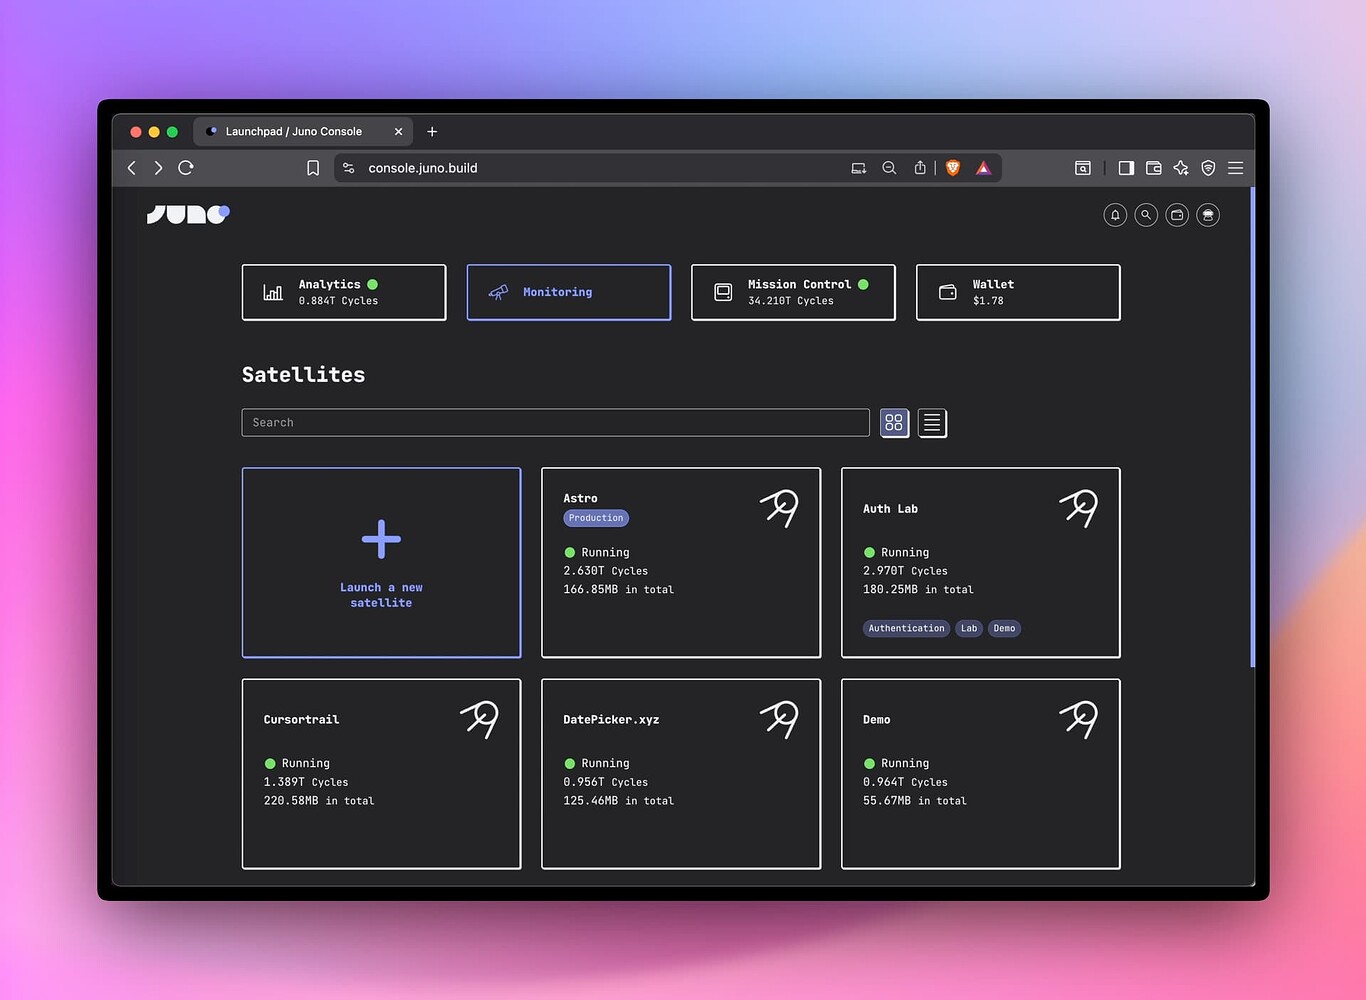
What’s New in Juno (November 2024 Edition)

· 5 min read

Hey everyone 👋

November’s been an exciting month, especially since I’ve officially started working full-time on Juno — thanks to the recently announced funding! This shift has already led to delivering some fantastic new features for developers, like automated backups (finally!!!), support for large WASM modules, the ability to buy cycles with Stripe, and a few other goodies.

These updates are all about making development smoother and more efficient, whether you’re building dapps, smart contracts, or managing your projects. Let’s dive into what’s new!


Backups

To kick things off, I’d like to highlight the introduction of backups—a feature I’ve been waiting for forever!

This addition brings a crucial layer of security for developers, letting you safeguard your modules and restore them whenever needed.

A screenshot of the steps for an upgrade

Here’s how it works: Currently, one backup per module is supported. You can manage backups manually via both the Console UI and the CLI, with options to create, restore, or delete them. Additionally, backups are automatically created during the upgrade process, taking a snapshot before transitioning to a new version. For those who prefer full control, advanced options let you skip creating a backup or avoid overwriting an existing one.

For anyone who, like me, feels a bit tense whenever it’s time to execute an upgrade, this feature is a huge relief. It’s really a great addition!


Buy Cycles with Stripe

Getting cycles has become more straightforward, particularly for newcomers and non-crypto-native users, with the ability to buy cycles directly through Stripe, thanks to our friends at cycle.express.

A screenshot of the integration with cycle.express

With this integration, developers can simply make a payment, and the cycles are added directly to their module.


Get ICP directly from the OISY Wallet

This was both a useful feature, as it makes it easy to transfer ICP from OISY to the developer's wallet on Juno, and an opportunity for me to try out the integration with various ICRC standards I implemented for the foundation.

A screenshot of the integration with OISY

I also used the opportunity to improve the UI/UX of the Receive feature by displaying wallet addresses with a QR code. This update wraps up a few related tasks, such as adding support for sending ICP to the outside world.

A screenshot of the new modal to send ICP to the outside world


Support for Large WASM Modules

Support for larger WASM modules (over 2MB) has been added. While none of Juno's stock modules—such as Satellites, Mission Control, or Orbiter (Analytics)—come close to this size when gzipped, this limit could quickly be reached by developers using serverless functions.

A screenshot of the upgrade process using the CLI

By extending this limit, developers have more flexibility to embed additional third-party libraries and expand their module capabilities.

This support has been implemented across the CLI, the Console UI, and even local development environments using Docker, ensuring a consistent experience for all workflows.


Default Web Page

Until recently, new Satellites launched lacked a default page for web hosting. This meant that developers opening their project right after creation would just see a blank page in the browser.

That’s why every new Satellite now comes with a sleek, informative default web page—delivering a great first impression right out of the box! ✨

A screenshot of the new default web page which contains links to the documentation


Pre- and post-deploy scripts

Another handy tool introduced this month is support for pre- and post-deploy scripts in the CLI. With this feature, developers can now define a list of commands to be executed at specific stages of the deployment process.

The pre-deploy scripts are perfect for automating tasks like:

  • Compiling assets.
  • Running tests or linters.
  • Preparing production-ready files.

Likewise, post-deploy scripts come in handy for follow-up tasks, such as:

  • Sending notifications or alerts to administrators.
  • Cleaning up temporary files.
  • Logging deployment information for auditing.
import { defineConfig } from "@junobuild/config";

/** @type {import('@junobuild/config').JunoConfig} */
export default defineConfig({
satellite: {
id: "ck4tp-aaaaa-aaaaa-abbbb-cai",
source: "build",
predeploy: ["npm run lint", "npm run build"],
postdeploy: ["node hello.mjs"]
}
});

Darker Dark Theme

Maybe not the most groundbreaking update, but the dark theme got even darker. 🧛‍♂️🦇 Perfect for those late-night coding sessions—or if you just enjoy the vibe!

A screenshot of the darker dark theme


Improved Documentation

Another area that saw improvement is the documentation. I aimed to make it more intuitive and useful for both newcomers and experienced developers. That’s why I revamped the guides section. Now, when you visit, you’ll be greeted with a simple question: “What are you looking to do? Build or Host?” 🎯. This approach should hopefully make onboarding smoother and more straightforward for developers.

The CLI documentation also received an upgrade. Updating it manually was a hassle, so I automated the process. Now, CLI help commands generate markdown files that are automatically embedded into the website every week. No more manual updates for me, and it’s always up to date for you! 😄

I also dedicated time to documenting all the configuration options in detail, ensuring every setting is clearly explained.

And as a finishing touch, I refreshed the landing page. 👨‍🎨

I hope these features get you as excited as they got me! I’m already looking forward to what’s next. Speak soon for more updates!

David


Stay connected with Juno by following us on X/Twitter.

Reach out on Discord or OpenChat for any questions.

⭐️⭐️⭐️ stars are also much appreciated: visit the GitHub repo and show your support!

A New Chapter Awakens

· 3 min read

A Futuristic cosmic scene with satellites orbiting a distant planet at sunrise, symbolizing renewal and progress in a minimalist space setting


TL;DR

I’ll be working 100% on Juno through 2025.

Hey everyone 👋

As you may know, I recently proposed transforming Juno into a Decentralized Autonomous Organization through an SNS swap. Unfortunately, it didn’t reach its funding goal, so Juno didn’t become a DAO.

After the failure, three options came to mind: retrying the ICO with a lower target, continuing to hack as an indie project for a while, or simply killing it.

In the days that followed, I also received a few other options, including interest from venture capitalists for potential seed funding which wasn’t an option for me.

Then, something unexpected happened:

The DFINITY foundation’s CTO, Jan Camenisch, reached out and proposed an alternative: funding the project through 2025.

I took a few days to consider the offer and ultimately accepted.

This support is a tremendous vote of confidence in Juno’s potential and importance within the ecosystem.

It’s worth emphasizing that the foundation’s support comes with no strings attached. They do not receive any stake in Juno, have no preferential treatment, and will not influence decisions. Should I ever consider another SNS DAO or any other funding route in the future, the foundation would have no special allocation or shares. This remains my project, and I am the sole decision-maker and controller.

This support also strengthens the relationship between Juno and the foundation, allowing us to stay in close contact to discuss the roadmap. It’s an arrangement that respects autonomy while fostering collaboration to advance the Internet Computer. As they say, it takes two to tango.

This funding opens up a world of possibilities and marks the first time I’ll work 100% on a project I created. I’m thrilled to continue building Juno as a resource that makes decentralized development accessible and impactful for everyone.

Obviously, while Juno remains under my sole ownership for now, I still believe that Juno should eventually become a DAO. Promoting full control for developers while retaining centralized ownership would be paradoxical. When the time is right, a DAO will ensure that Juno’s growth, security, and transparency are upheld through community-driven governance.

Thank you to everyone who believed in Juno through the SNS campaign and beyond 🙏💙. Your support has been invaluable, and this new phase wouldn’t be possible without you. Here’s to what lies ahead—a new chapter indeed.

To infinity and beyond,
David


Stay connected with Juno by following us on X/Twitter.

Reach out on Discord or OpenChat for any questions.

⭐️⭐️⭐️ stars are also much appreciated: visit the GitHub repo and show your support!

Building Tomorrow: Juno Build DAO for the Future

· 5 min read

A cover image that contains the title of the blog post and a drawing of a satellite being launched


ICO Failure

The SNS DAO on the Internet Computer failed on Saturday, October 12, 2024 (ICP swap data). As a result, Juno did not become a Decentralized Autonomous Organization (DAO).

Hey everyone 👋

I hope you’re all doing well! I’m excited to share some big news with you today. Over the next few weeks, we’re taking some significant steps toward shaping the future of Juno, and I wanted to keep you in the loop about what’s coming.

As you may know, Juno is a blockchain-as-a-service ecosystem that empowers developers to build decentralized apps efficiently. One of its strengths is that it gives developers full and sole control over their work. For this reason, it would be paradoxical to continue operating the platform with a centralized model—i.e., with me being the sole controller of services, such as the administration console or our CDN. That’s why I’m thrilled to unveil that, in the upcoming weeks, I’m aiming to fix this bias by proposing that Juno becomes a Decentralized Autonomous Organization (DAO).

While this potential shift is on the horizon, there are a few key steps you can take to stay informed and involved in the process. Here’s how you can help shape the future of developing on Web3:


1. Sign Up to Join the Party

To ensure you don’t miss any crucial updates, I encourage you to sign up for our newsletter. The journey to proposing a DAO and making it a reality involves multiple steps, each requiring your participation. By signing up, you’ll receive timely notifications whenever there’s an opportunity to get involved and make a real impact.


2. Get Informed

note

The white paper has been updated to continue presenting the vision; however, the tokenomics aspect has been notably removed, as it is no longer relevant following the failure of the SNS DAO.

I’ve put together a white paper that outlines the reasoning and vision I have for a Juno Build DAO. I highly recommend giving it a read to fully understand what I’m aiming to achieve.

If you have any questions, feel free to reach out on Discord, Twitter/X, OpenChat or also the DFINITY forum (as requested per their guidelines).

Questions are always welcome at any time, but if you’re looking to engage directly, I’ll be hosting a Juno Live session on 9 September at 3:00 PM CET. Join the livestream on YouTube to interact in real-time.


3. Cast Your Vote

info

The proposal was approved and executed on September 26, 2024.

While I typically avoid relying on third parties for core features, transforming Juno into a DAO without leveraging such services would be an immense task. That’s why I’m proposing to use the Internet Computer’s built-in solution for creating and maintaining DAOs, known as SNS.

To kickstart the process of transforming our ecosystem, this framework requires submitting a proposal to the Internet Computer’s governance, known as NNS. This step ensures a decentralized and democratic process. It also prepares for the handover of control of the smart contracts and allows all participants to review the parameters involved.

Once this proposal is live, your voice will be crucial! You’ll have the opportunity to vote on whether to accept or reject it.

Without your approval, the ICO won’t even start.


4. Participate in the ICO

Disclaimer

Please note that the following does not constitute financial advice.

If the proposal is approved, an initial decentralization swap will be kicked off. The goal here is to raise the initial funds for the DAO and to decentralize the voting power. Think of it like crowdfunding, where people contribute ICP tokens. In return, participants are rewarded with staked tokens, giving them a share of the DAO's voting power.

For the swap to succeed, it requires at least 100 participants and 200,000 ICP tokens. Otherwise, the entire journey of transforming Juno into a DAO fails. So, if you’re excited about being part of this adventure, this could be the step where you make a real difference — if you decide on your own will to do so.


5. Outcome

If the swap fails, it will mark the beginning of the end. While the platform won’t be deprecated immediately, I will gradually phase it out over the course of, let's say, a year. During this time, Juno will stop accepting new developers, and I will no longer develop new features, promote the eco-system, or invest in it beyond maintenance.

For those already using Juno, I want to reassure you that I won’t leave you stranded. I’m committed to offering support to help you transition and find suitable alternatives. I’m not, I hope, that much of an a-hole. I try to maintain good karma.

On a personal note, I would also be deprecating all of my personal projects, such as proposals.network, as I have no intention of using any developer tooling other than Juno for my own Web3 projects.

If the swap is successful, hooray! Juno will officially become a DAO, allowing you to actively participate in the governance of the project and start using the new JUNOBUILD token, among other exciting developments.

This will mark the beginning of an exciting new chapter, with the community at the heart of Juno's future.

To infinity and beyond,
David


Useful Links:

How to Launch Your First Memecoin Token on the Internet Computer (ICP)

· 13 min read

A cover title for the article


Introduction

Memecoins are starting to gain significant traction. Some of these tokens, such as Windowge98, Damonic Welleams, Wumbo, Spellkaster and $stik, have reached high prices and attracted many retail investors into the ecosystem. Now, you may be wondering how these meme tokens were launched. In this article, we will walk you through all the steps you need to follow in order to create your own memecoin project.

From creating the token smart contract (canister) to building a marketing website using Juno, and finally launching the token on ICPSwap, a major decentralized exchange (DEX) on ICP, we've got you covered.

We will also provide useful tips to ensure your memecoin project is successful. By the end of this article, you will have all the information needed to launch your token.

important

This article is for educational purposes only and is not financial advice of any form.


What is ICP

The Internet Computer (ICP) is a blockchain-based platform that aims to create a new type of internet, one that is decentralized, secure, and scalable. Developed, among others, by the DFINITY Foundation, the Internet Computer is designed to serve as a global public compute infrastructure, allowing developers to build and deploy decentralized applications (dApps) and services directly on the blockchain. Learn more about ICP


What is Juno

Juno is a blockchain-as-a-service (“blockchainless”) platform that empowers developers to build decentralized apps efficiently. Similar to Web2 cloud service platforms but with significant improvements, it offers a comprehensive toolkit to scaffold secure and efficient projects running on the blockchain.

In short, Juno is the Google Firebase alternative for Web3.


Creating the token smart contract canister

info

There are simpler ways to launch your own token that do not involve scripting, such as using no-code platforms like ICTO, ICPEx or ICPI.

However, since Juno is dedicated to providing developers with full ownership without compromise, this tutorial showcases an approach that aligns with our core values.

If you prefer to use one of those services, that's cool. Some of those also share these values; we just suggest you do your own research before making a decision.

And who knows, maybe in the future, Juno itself will make launching ledgers to the moon easy too! 😉

To deploy a ledger for your token proceed as following:

  • Make sure you have the dfx CLI installed on your machine. If not, follow this guide to complete the installation.

  • Creating a canister requires cycles, which measure and pay for resources like memory, storage, and compute power. Follow this guide to load cycles on your machine for deploying your ledger.

The following steps assume that you have cycles on your machine

  • On your computer, make an empty folder and name it myToken, and open it in your favorite editor

  • Create a file inside the folder and name it dfx.jsonpaste the code below

{
"canisters": {
"myToken": {
"type": "custom",
"candid": "https://raw.githubusercontent.com/dfinity/ic/4472b0064d347a88649beb526214fde204f906fb/rs/rosetta-api/icrc1/ledger/ledger.did",
"wasm": "https://download.dfinity.systems/ic/4472b0064d347a88649beb526214fde204f906fb/canisters/ic-icrc1-ledger.wasm.gz"
}
},
"defaults": {
"build": {
"args": "",
"packtool": ""
}
},
"output_env_file": ".env",
"version": 1
}

Next, we are going to define some parameters for our token and prepare the script for deployment.

Create a new file named deploy.sh and paste the following code:

#!/usr/bin/env bash

# Token settings
TOKEN_NAME="FROGIE"
TOKEN_SYMBOL="FRG"
TRANSFER_FEE=10000
PRE_MINTED_TOKENS=100_000_000_00_000_000
FEATURE_FLAGS=true
TRIGGER_THRESHOLD=2000
CYCLE_FOR_ARCHIVE_CREATION=10000000000000
NUM_OF_BLOCK_TO_ARCHIVE=1000

# Identities
dfx identity use default
DEFAULT=$(dfx identity get-principal)

dfx identity new archive_controller
dfx identity use archive_controller
ARCHIVE_CONTROLLER=$(dfx identity get-principal)

dfx identity new minter
dfx identity use minter
MINTER=$(dfx identity get-principal)

# Switch back to the identity that contains cycles
dfx identity use "<YOUR-IDENTITY>"

# Create and deploy the token canister
dfx canister create myToken --network ic
dfx deploy myToken --network ic --argument "(variant {Init =
record {
token_symbol = \"${TOKEN_SYMBOL}\";
token_name = \"${TOKEN_NAME}\";
minting_account = record { owner = principal \"${MINTER}\" };
transfer_fee = ${TRANSFER_FEE};
metadata = vec {};
feature_flags = opt record{icrc2 = ${FEATURE_FLAGS}};
initial_balances = vec { record { record { owner = principal \"${DEFAULT}\"; }; ${PRE_MINTED_TOKENS}; }; };
archive_options = record {
num_blocks_to_archive = ${NUM_OF_BLOCK_TO_ARCHIVE};
trigger_threshold = ${TRIGGER_THRESHOLD};
controller_id = principal \"${ARCHIVE_CONTROLLER}\";
cycles_for_archive_creation = opt ${CYCLE_FOR_ARCHIVE_CREATION};
};}
})"

In this script, we define our token's name, symbol, transfer fee, and initial supply. Adjust these settings to match your tokenomics and token information details. For our token, we are premining 100 million tokens.

The script also specifies default settings for the token and sets up identities for minting and archiving.

note

Ensure you switch back to the identity that contains the cycles on your machine before running the commands below.

Once the file saved, run the command below in your terminal to deploy the token canister on the network:

./deploy.sh

If all the previous steps are successful, you should get a link in this format https://a4gq6-oaaaa-aaaab-qaa4q-cai.raw.icp0.io/?id=<TOKEN-CANISTER-ID> where TOKEN-CANISTER-ID is the id of your token ledger that was deployed.

All the premined tokens are now held by the principal address of the default identity. You can transfer these to an external wallet like plug to ease with the transfer process since using the command line to distribute the tokens is a little bit cumbersome. Learn more about creating token canisters

The next step is to set up a marketing website for your project.


Launching the marketing website

In this section, we will guide you through setting up a marketing website for your token using Juno. Follow these steps to create your site.

  • Ensure you have Node.js and npm installed on your computer. If not, follow the guide to install them.

  • Open your computer's terminal and run the following command to initialize a template:

npm create juno@latest -- --template astro-starter
  • Provide the name of the project folder myWebsite
  • Select no to configure Github Actions
  • Select no to configure the local development emurator
  • Select yes to install the dependencies
  • Select yes to install juno's CLI tool. Juno CLI will help us to deploy our project in the satellite.

Navigate to the project folder myWebsite and open it in your favorite code editor. If every previous step is successfull, running npm run dev in the terminal will open the project in the browser and you should have something similar to this.

board


Editing the code for the website

We will create a simple website for our token.

In the pages folder, replace all the code in the index.astro with the code below

---
import BaseHead from "../components/BaseHead.astro";
import { SITE_TITLE, SITE_DESCRIPTION, SITE_SOCIAL_IMAGE } from "../consts";
---

<!doctype html>
<html lang="en">
<head>
<BaseHead
title={SITE_TITLE}
description={SITE_DESCRIPTION}
image={SITE_SOCIAL_IMAGE}
/>
</head>
<body class="font-montserrat m-0 p-0 bg-[#1a1a2e] text-white">
<div class="container max-w-[1200px] mx-auto px-5">
<header class="flex justify-between items-center py-5">
<div class="logo text-2xl font-bold text-green">Frogie</div>
<nav>
<ul class="list-none flex">
<li class="ml-5"><a href="" class="text-white hover:text-[#ffd700]">About</a></li>
<li class="ml-5"><a href="" class="text-white hover:text-[#ffd700]">Tokenomics</a></li>
<li class="ml-5"><a href="" class="text-white hover:text-[#ffd700]">Roadmap</a></li>
<li class="ml-5"><a href="" class="text-white hover:text-[#ffd700]">Community</a></li>
</ul>
</nav>
</header>

<main>
<section class="flex flex-col items-center w-full justify-center py-[40px]">
<div class="mb-5 flex items-center justify-center w-full ">

<img height="200" class="rounded-full" width="200" src="https://github.com/sam-thetutor/images/blob/main/imgs/face.png?raw=true" alt="">
</div>
<span>Pepe's long lost cousin has arrived</span>
<h2 class="text-2xl mt-6">Token Details</h2>
<div class="flex w-1/2 mt-4 gap-2 p-4 justify-center">
<div class="flex flex-col justify-center gap-1 items-center w-full md:w-1/2 lg:w-1/2">
<h3 class="text-lg">Canister Address</h3>
<p class="text-center text-sm">3a6gm-gyaaa-aaaam-acvqa-cai</p>
</div>
<div class="flex flex-col justify-center gap-1 items-center w-full md:w-1/2 lg:w-1/3">
<h3 class="text-lg">Total Supply</h3>
<p class="text-center">100M</p>
</div>
<div class="flex flex-col justify-center gap-1 items-center w-full md:w-1/2 lg:w-1/3">
<h3 class="text-lg">Ticker Name</h3>
<p class="text-center">$FRG</p>
</div>
</div>

<button class="inline-block mt-8 bg-[#ffd700] text-[#1a1a2e] px-[30px] py-[15px] rounded-[5px] font-bold hover:bg-[#ffed4a]">
Buy Frogie Now
</button>
</section>

<section class="flex justify-center gap-8 items-center mb-16">
<div class="flex flex-col justify-center gap-2 items-center">

<img src="https://github.com/sam-thetutor/images/blob/main/imgs/forgie5.png?raw=true" class="h-[100px] w-[100px] flex rounded-full" alt="">
<h2 class="text-2xl">Moon-bound Potential</h2>
<p class="text-center flex ">Our advanced memetics ensure stratospheric growth! From the waters to the moon</p>
</div>
<div class="flex flex-col justify-center gap-2 items-center">
<img src="https://github.com/sam-thetutor/images/blob/main/imgs/frogie6.png?raw=true" class="h-[100px] w-[100px] flex rounded-full" alt="">
<h2 class="text-2xl">Vibrant Community</h2>
<p class="text-center flex ">Join thousands of fellow members and hodlers!</p>
</div>
<div class="flex flex-col justify-center gap-2 items-center">
<img src="https://github.com/sam-thetutor/images/blob/main/imgs/frogie7.png?raw=true" alt="Meme icon" class="w-[100px] h-[100px] flex rounded-full" />
<h2 class="text-2xl">Meme-powered</h2>
<p class="text-center flex ">I am green when the market is up and red when the market is down</p>
</div>
</section>
</main>
</div>
<div class=" py-[10px] overflow-hidden">
<div class=" inline-block whitespace-nowrap pl-[10%]">
<span class="inline-block px-[20px]">🚀 Frogie to the moon!</span>
<span class=" inline-block px-[20px]">💎 HODL for life!</span>
<span class="inline-block px-[20px]">🐸 Pepe's long lost cousin is here!</span>
<span class=" inline-block px-[20px]">🎉 1 Frogie = 1 Frogie</span>
</div>
</div>
<footer class="text-center py-[20px] bg-[#16213e]">
<p>&copy; 2024 Frogie. All rights reserved. To the moon! 🚀</p>
</footer>

</html>

In the above code, we created a simple website to display the logo of our token, as well as the name,symbol and total supply of the token. There is also a button that allows the user to but our token from an exchange where it is listed.

Edit the code above to display the information of your token including the name, symbol, total supply, and logo.


Creating a satellite

We need to create a satellite that will host our website. Follow the steps below to create your own satellite from the Juno console.

note

A satellite is a smart contract provided by Juno, packed with features such as authentication, simple database, file storage and, hosting.

  • Navigate to the Juno's administration console website
  • Login with your Internet Identity
  • On the dashboard, select Launch new satellite
  • Provide name myWebsite for the satellite.
  • Click Create

Connect Project to the Satellite

One last step before deployment, we have to link our local project with the satellite that lives on chain. Follow the steps below:

  • Back to the project terminal on your computer, run the command juno init and follow the prompts.

  • Select yes to login and authorize your terminal to access your satellite.

  • Select myWebsite as the satellite to connect to.

  • Select dist as the location of the compiled app files.

  • Select TypeScript as the configuration file format.

If the above step is successful, a new file juno.config.ts will be added at the root of our project folder.


Compiling and deploying the Project

Now that we connected our project to the satellite, we can compile and deploy the website.

npm run build

The above command compiles our website and outputs the compiled files in the dist folder

juno deploy

This will deploy our compiled files to the satellite that we connected linked our website to.

At this stage, if all the previous steps are successful, the command will output a link which is in this format https://<SATELLITE_ID>.icp0.io where SATELLITE_ID is the id of the satellite that we connected our project to.

tip

Running juno open in your terminal opens your project in your favorite browser.

Opening the link in the browser, you should have something like this below

website


Listing the token on ICPSwap

In this section, we will look at how to list our newly created token on ICPSwap.

ICPSwap is a decentralized exchange that facilitates token trading and swapping by allowing tokens to be listed and liquidity pools to be created for different token pairs.

And because ICPSwap is a decentralized autonomous organization (DAO) controlled by the community members, you need to submit a proposal for your token to be added on the exchange. This proposal will be voted on by the community members. If the proposal passes, the token will be listed on this exchange.

We will create a proposal to add our token on ICPSwap in the following steps.

  • Visit the ICPSwap community group on OpenChat
  • Click on te three dots in the right corner and select make proposal

makeproposal

  • Select MOTION as the proposal type
  • Add a descriptive title, something like "ADD FROGIE TO THE TOKEN LIST"
  • In the summary section,add all the details about your token forexample the token canister address, social media handles and any other information you feel will help the voter to understand more about your token
  • Once your have filled all the fields, click submit and the proposal will be submitted.

NOTE: You will be charged a fee of 50 ICS for this service, therefore ensure you have enough ICS balance before you perform this step.

kk

The voting duration for proposals on the ICPSwap platform is typically three days. If a proposal passes during this voting period, your token will be listed on the exchange and will be tradable. Once your token is available for trading, you can update the link on the Buy Frogie Now button to redirect the user to the exchange from where they can buy the token.

note

You can also use proposals.network as an alternative to submit a proposal to any SNS project.

If you have reached this step without any errors, congratulations, you have created your first meme coin project. 🥳

Now you can start marketing to attract more users and holders. Good luck! 🤞


Tips for a successful memecoin project

In this section, we will cover some tips you need to launch a successful memecoin project.


Develop a Unique and Relatable Concept

The first step to creating a successful meme coin is finding a unique topic that resonates with people. Your concept should be relatable, funny or nostalgic. Capture the essence of internet culture with a catchy name and logo that embodies the humor and appeal of your chosen meme.


Build a Strong Community

Think of your meme coin's community like a big group of friends who all love the same joke. To make that friend group huge and enthusiastic:

  • Know your meme and what makes your coin funny
  • Find the websites, apps, and chat rooms where your target audience hangs out and get involved
  • Make hilarious memes using your coin's name or logo and encourage your community to create them too
  • Give away some of your coin as prizes to active community members
  • Work with other meme coins or popular meme accounts to reach even more people
  • Make new people feel instantly part of the joke

Implement a Comprehensive Marketing Strategy

Effective crypto marketing is critical for meme coin success. Implement a multi-faceted strategy across various channels:

  • Utilize social media platforms like Twitter, Reddit, and Telegram to build a strong online presence
  • Create engaging content like memes, videos, blog posts to generate buzz and attract attention
  • Host events, AMAs, and giveaways to keep your audience interested and invested
  • Form strategic partnerships with influencers, projects, and industry leaders to expand your reach
  • Monitor performance using analytics tools and gather feedback to continuously improve

Leverage Influencer Marketing

Most successful meme coin projects hire specialized crypto influencer marketing teams with extensive networks. Partner with online personalities who like memes or crypto and have them talk about your coin to their followers.


Conclusion

In this article, we have covered everything you need to launch a successful memecoin project, from creating the token canister, to creating a marketing website using Juno and listing the token on ICPSwap. This article is for educational purposes only and is not financial advice of any form. Do Your Own Research (DYOR) if you want to invest in memecoins.

👋

Stay connected with Juno by following us on Twitter to keep up with our latest updates.

And if you made it this far, we’d love to have you join the Juno community on Discord. 😉

How to Redirect a Route After Renaming It

· 4 min read

Photo by Nick Fewings on Unsplash


Introduction

Renaming a route in your web application is a common task, but it’s crucial to handle it correctly to avoid breaking links and negatively impacting your SEO. Redirecting the old route to the new one ensures a seamless user experience and maintains your site's search engine rankings.

In this blog post, we’ll guide you through the steps to set up a redirection after renaming one of your pages.

How to Build a Secure and Decentralized Blog Website on the Blockchain

· 11 min read


Introduction

Beyond cryptocurrencies, Blockchain technology offers tools to build secure, transparent applications fully controlled by the user. Building a blog website on the blockchain allows the user to establish a censorship resistant space where they retain full ownership of their content and data.

In this article, we will look at how to create and host your blog website on the blockchain using Juno. Juno is an open-source Blockchain-as-a-service platform that offers a fully decentralized and secure infrastructure for your applications. This article will cover setting up a boilerplate project, configuring the hosting, developing the code for your blog and deploying the project on the blockchain using some of Juno's super powers.

By the end of this article, you will have an understanding of how Juno works, how to host your websites on the blockchain and how to automate the different tasks using Github Actions.


Prerequisites

  • Prior knowledge of working with HTML, CSS and JavaScript
  • Prior knowledge of working with terminal or command line
  • Prior knowledge of Github

To follow along this article, you dont need any knowledge about crypto and blockchain


What is Juno?

Juno works just like traditional serverless platforms such as Google Firebase or AWS Amplify, but with one key difference: everything on Juno runs on the blockchain. This means that you get a fully decentralized and secure infrastructure for your applications, which is pretty cool if you ask me.

Behind the scenes, Juno uses the Internet Computer blockchain network and infrastructure to launch what we call a “Satellite” for each project you build. A Satellite is essentially a smart contract on steroids that contains your entire app. From its assets provided on the web (such as JavaScript, HTML, and image files) to its state saved in a super simple database, file storage, and authentication, each Satellite controlled solely by you contains everything it needs to run smoothly.


What is ICP?

The Internet Computer (ICP) is a blockchain-based platform that aims to create a new type of internet, one that is decentralized, secure, and scalable. Developed, among others, by the DFINITY Foundation, the Internet Computer is designed to serve as a global public compute infrastructure, allowing developers to build and deploy decentralized applications (dApps) and services directly on the blockchain.

Unlike traditional blockchains, the Internet Computer uses a unique consensus mechanism called Threshold Relay, which allows it to achieve high transaction throughput and low latency. The platform is also designed to be highly scalable, with the ability to add more nodes and increase its computing power as demand grows. This makes the Internet Computer a promising platform for building a wide range of decentralized applications, from social media and e-commerce to finance and cloud computing. Learn more about ICP


About the Project

This is a secure and decentralized blog website. The frontend is build with Astro, which is a modern, flexible web framework focused on building fast, content-rich websites with minimal JavaScript. Here is what you will build by the end of thi article:

live project


Setting up the project

In this section, we will look at how to create a boilerplate template for our project.

In your terminal, run the command below

npm create juno@latest -- --template astro-starter

In the prompts;

  • Provide the name of the project folder myBlog
  • Select yes to configure Github Actions
  • Select no to configure the local development emurator
  • Select yes to install the dependencies
  • Select yes to install juno's CLI tool. Juno CLI will help us to deploy our project in the satellite.

Navigate to the project folder myBlog and open it in your favorite code editor. If every previous step is successfull, running npm run dev will open the project in your browser and you should have something similar to this.

template


File Structure

Having followed the above steps, and opening the project in a code editor, your project should have a file structure similar to the one below.

filestructure


Blog code

In this section,we will adapt the boilerplate code to transform your project into a blogging website.

index.astro

Replace all the code in the in the index.astro file with the code below

---
// Import necessary components and data
import blogPosts from '../components/blogPosts.json';
import Article from '../components/Article.astro';
import Background from "../components/Background.astro";
import BaseHead from "../components/BaseHead.astro";
import { SITE_TITLE, SITE_DESCRIPTION, SITE_SOCIAL_IMAGE } from "../consts";

---

<!doctype html>
<html lang="en">
<head>
<BaseHead
title={SITE_TITLE}
description={SITE_DESCRIPTION}
image={SITE_SOCIAL_IMAGE}
/>
<link rel="stylesheet" href="https://cdn.jsdelivr.net/npm/tailwindcss@2.2.16/dist/tailwind.min.css" />

</head>

<body>
<header class="bg-gray-800 text-white py-4">
<nav class="container mx-auto flex justify-between items-center">
<a href="/" class="text-xl font-bold">My Blog</a>
<ul class="flex space-x-4">
<li><a href="/" class="hover:text-gray-300">Home</a></li>
<li><a href="*" class="hover:text-gray-300">Articles</a></li>
<li><a href="*" class="hover:text-gray-300">About</a></li>
</ul>
</nav>
</header>

<main>
<div class="container mx-auto my-8">
<div class="grid grid-cols-1 md:grid-cols-2 lg:grid-cols-3 gap-8">
{blogPosts.map((post) => (
<Article
title={post.title}
image={post.image}
description={post.description}
url={post.url}
/>
))}
</div>
</div>
</main>
<Background/>
</body>
</html>

The above code displays a navbar that has three tabs Home,Articles, and About. It also displays information about the different articles from our sample article data.

Article.astro

Replace the code in the Article.astro file with the code below

---
interface Props {
title: string;
image: string;
description: string;
url: string;
}

const { title, image, description, url } = Astro.props;
---

<div class="bg-white shadow-md rounded-lg overflow-hidden">
<a href={url} target="_blank">
<img src={image} alt={title} class="w-full h-48 object-cover" />
</a>
<div class="p-4">
<h3 class="text-xl font-bold mb-2">{title}</h3>
<p class="text-gray-600 mb-4">{description}</p>
<a href={url} target="_blank" class="text-blue-500 hover:text-blue-700">Read more</a>
</div>
</div>

We will diplsay the title, image, desciption of every article from our sample data, as well as a link to the full article.

blogPosts.json

In the components folder, create a new file and name it blogPosts.json. Paste the code below

[
{
"title": "Introduction to Astro",
"image": "https://juno.build/img/cloud.svg",
"description": "Astro is a new static site generator that makes it easy to build fast, content-focused websites.",
"url": "https://docs.astro.build/en/getting-started/"
},
{
"title": "Tailwind CSS: A Utility-First CSS Framework",
"image": "https://juno.build/img/launch.png",
"description": "Tailwind CSS is a utility-first CSS framework that makes it easy to build responsive and customizable user interfaces.",
"url": "https://tailwindcss.com/docs/installation"
},
{
"title": "The Benefits of Static Site Generation",
"image": "https://juno.build/img/moon.svg",
"description": "Static site generation offers several benefits, including improved performance, better security, and easier deployment.",
"url": "https://www.netlify.com/blog/2016/05/02/top-ten-reasons-the-static-website-is-back/"
},
{
"title": "Introduction to Astro",
"image": "https://juno.build/img/illustration.svg",
"description": "Astro is a new static site generator that makes it easy to build fast, content-focused websites.",
"url": "https://docs.astro.build/en/getting-started/"
}
]

This file holds our sample article data that we are using for this project.

If all the above steps are successfull, your project should look like this in the browser

local project


Deployment

In this section, we will look at how to deploy our project live.

Creating a satellite

We need to create a satellite that will host our project. Follow the steps below to create your own satellite.

juno statellite

  • Navigate to the administration console website
  • Login with your internet Identity
  • On the dashboard, select Launch new satellite
  • Provide name myBlogSatellite for the satellite.
  • Click Create Satellite
tip

To keep the satellite operational, the developer pays a small fee that is used to purchase the necessary cycles for the satellite's storage and computation requirements. Learn more about pricing


Connect Project to the Satellite

We need to link our project to the satellite. follow the steps below

In the project terminal, run the command juno init and follow the prompts

  • Select yes to login and authorize the terminal to access your satellite in your browser

  • Select myBlogSatellite as the satellite to connect the project to

  • Select dist as the location of the compiled app files

  • Select TypeScript as the configuration file format.

If the above step is successful, a new file juno.config.ts will be added at the root of our project folder. It contains the configuration necessary for our poject to connect to the satellite. You need this file if your project is to be deployed successfully to the satellite. Learn more about this configuration

Compiling and deploying the Project

Now that we connected our project to the satellite, we have to compile and deploy project to the satellite

npm run build

The above command compiles our project and outputs the compiled files in the dist folder

juno deploy

This will deploy our compiled files to the satellite that we connected linked our project to.

At this stage, if all the previous steps are successful, juno deploy command will output a link whixh is in this format https://<SATELLITE_ID>.icp0.io where SATELLITE_ID is the id of the satellite that we connected our project to.

tip

Running juno open in your terminal opens your project in your favorite browser.

Opening the link in the browser, you should have something like this below live project

If you have reached this step, well done, you have successfully deployed your first blog website on the blockchain using Juno.


Setting up Github Actions

If you noticed in the previous steps, every time we make changes to our project, we have to manually run the commands that compile and deploy our code to the satellite. But in this section, we will learn how to automate these tasks using Gihtub Actions so that whenever we make changes to our project, these changes are automatically deployed to oour satellite

In our project, we have a folder .github which contains the file deploy.yaml. This file has all the configurations required to setup Github Actions in our project. This folder must be present in your poject to successfully setup Github Actions. You can add it manually if you dont have it in your project. Below are the contents of the deploy.yaml file

name: Deploy to Juno

on:
push:
branches: [main]

jobs:
build:
runs-on: ubuntu-latest
steps:
- name: Check out the repo
uses: actions/checkout@v4

- uses: actions/setup-node@v4
with:
node-version: 22
registry-url: "https://registry.npmjs.org"

- name: Install Dependencies
run: npm ci

- name: Build
run: npm run build

- name: Deploy to Juno
uses: junobuild/juno-action@main
with:
args: deploy
env:
JUNO_TOKEN: ${{ secrets.JUNO_TOKEN }}

Generating a secret token from the juno console

To set up Github Actions, we need a secret token that uniquely identifies our satellite. Github needs this secret token to associate our repo to the satellite.

  • Visit juno console, and select myBlogSatellite satellite.
  • Under the controllers tab, click add controller
  • Select 'Genetate new controller' and select 'Read-write' as the scope.
  • Click submit. Once the new controller is generated, it will provide a secret token, copy and store the secret token. secret token

Setting up Github Repo

On your Github account, create a new repo and name it myfirstBlog.

  • On the settings tab, navigate to Secrets and variables and click Actions.
  • Click on the new repository secret, add JUNO_TOKEN as the name, paste the secret token you copied from the juno console in the Secret section.
  • Click Add secret.

github repo

Pushing Code to Github

To upload our code to our remote GitHub repository, we must establish a connection between our local project and the repository

Run the command below in your project terminal

git init
git remote add origin https://github.com/sam-thetutor/myfirstBlog.git
git add .
git commit -m "my first commit"
git push -u origin main

The above code established the required connection to our remote Github repo, and pushes all our project code to that repo.Now every time we make changes to our project, all we have to do is push these changes to our github repo and they will be deployed to our satellite automatically. Learn more about setting up Github Actions with Juno


Next Steps

Now that we have successfully hosted our blog website on the blockchain, you can go ahead and add more articles to the blog to showcase your skills. You can also add more features on the website to make it more robust.


Conclusion

In this article, we have looked at how to create a boilerplate template project using juno, how to create a satellite from the juno console, writing code for our project, how to connect the satellite to the our local project, deploying our project to the satellite and configuring Github Actions to automate compiling and deployment tasks for our project


👋

Stay connected with Juno by following us on Twitter to keep up with our latest updates.

And if you made it this far, we’d love to have you join the Juno community on Discord. 😉

Unleashing the Infinite with Serverless

· 8 min read


Hey there 👋,

Are you looking to extend Juno's features? Stop right there, because it is now possible!

I'm thrilled to unveil today's new addition to the set of features offered by Juno: the introduction of serverless Functions enabling developers to extend the native capabilities of Satellites. This groundbreaking update opens a plethora of opportunities for developers to innovate and customize their applications like never before.


What Are Serverless Blockchain Functions?

In the realm of cloud computing, serverless architecture allows developers to build and run applications and services without the burden of managing infrastructure. This model enables the execution of server-side code based on user demand, allowing for direct interactions with APIs, databases, and other resources as part of your project's deployment. It's a paradigm that significantly reduces overhead and increases the agility of software development processes.

The introduction of serverless blockchain functions by Juno innovatively takes this concept a step further by integrating blockchain technology into this flexible and efficient framework. This groundbreaking development opens the door for extending the native capabilities of Satellites smart contracts, pushing the boundaries of what's possible within the blockchain space.

This means you can now enhance the functionality of Satellites smart contracts and extend those capabilities with anything that can be achieved on the Internet Computer blockchain.


How Does It Work?

At the core of Juno's serverless blockchain functions are hooks, which are essentially the backbone of how these functions operate within the ecosystem. These hooks are defined to automatically respond to event triggers related within your Satellite, including operations such as creating, updating, and deleting to documents and assets.

An essential feature of these optional hooks is their ability to spawn asynchronously, a design choice that significantly enhances the efficiency and responsiveness of applications built on Juno. This asynchronous spawning means that the hooks do not block or delay the execution of calls and responses between your client-side decentralized application (dApp) and the smart contract.

A picture is worth a thousand words, so here is a simplified schematic representation of a hook that is triggered when a document is set:


Getting Started

In addition to unveiling this new feature, we're also excited to introduce a brand-new developer experience we hope you're going to enjoy. This is built on the local development environment we released earlier this year, designed to make your work with Juno smoother and more intuitive.

note

Make sure you have Juno's CLI tool installed on your machine.

Start by ejecting the Satellite within your project. This step prepares your project for local development. Open your terminal and run:

juno dev eject

In a new terminal window, kick off the local development environment that leverages Docker:

juno dev start

Now, your local development environment is up and running, ready for you to start coding.

Once you're ready to see your changes in action, compile your code:

juno dev build

One of the key benefits of Juno's local development environment is its support for hot reloading. This feature automatically detects changes to your code and deploys them in the local environment. It means you can immediately test your custom code locally, ensuring a fast and efficient development cycle.


Demonstrating Hooks and Data Operations

This sample application illustrates the use of Juno's serverless functions to perform asynchronous data operations with a small frontend client and backend hook setup.

The frontend client is designed to save a document in the Datastore, while the backend hook modifies this document upon being triggered. This process exemplifies the asynchronous capability of functions to read from and write to the Datastore.

Getting the Sample

To begin exploring this functionality, clone the example repository and prepare the environment with the following commands:

git clone https://github.com/junobuild/examples
cd rust/hooks
npm ci

After setting up the project, to start and debug the sample in your local environment, please follow the steps as outlined in the previous chapter Getting Started.

Hook Implementation Details

The core of this sample is the hook code, which is triggered upon the document set operation in a specific collection. Here’s the hook's logic:

#[on_set_doc(collections = ["demo"])]
async fn on_set_doc(context: OnSetDocContext) -> Result<(), String> {
// Decode the new data saved in the Datastore
let mut data: Person = decode_doc_data(&context.data.data.after.data)?;

// Modify the document's data
data.hello = format!("{} checked", data.hello);
data.yolo = false;

// Encode the data back into a blob
let encode_data = encode_doc_data(&data)?;

// Prepare parameters to save the updated document
let doc: SetDoc = SetDoc {
data: encode_data,
description: context.data.data.after.description,
updated_at: Some(context.data.data.after.updated_at),
};

// Save the updated document
set_doc_store(
context.caller,
context.data.collection,
context.data.key,
doc,
)?;

Ok(())
}

This hook demonstrates asynchronous processing by reading the initial data saved from the frontend, modifying it, and then saving the updated version back to the Datastore. It's triggered specifically for documents within the "demo" collection and showcases how to handle data blobs, execute modifications, and interact with the Datastore programmatically.


Unlocking Anything on the Internet Computer

As mentioned in the introduction, the serverless functions extend Juno's capabilities to anything that can be achieved on the Internet Computer. With this in mind, let's explore implementing HTTPS outcalls to a Web2 API in another sample.

Getting the Sample

To explore this advanced functionality, follow the steps below to clone the repository and set up the project:

git clone https://github.com/junobuild/examples
cd rust/https-outcalls
npm ci

After cloning and navigating to the correct directory, proceed with starting and debugging the sample in your local environment, as outlined in the Getting Started chapter.

Hook Implementation Details

The hook implemented in this sample interacts with the Dog CEO API to fetch random dog images and update documents within the dogs collection in the Datastore. Here's how it works:


// The data of the document we are looking to update in the Satellite's Datastore.
#[derive(Serialize, Deserialize)]
struct DogData {
src: Option<String>,
}

// We are using the Dog CEO API in this example.
// https://dog.ceo/dog-api/
//
// Its endpoint "random" returns such JSON data:
// {
// "message": "https://images.dog.ceo/breeds/mountain-swiss/n02107574_1118.jpg",
// "status": "success"
// }
//
// That's why we declare a struct that matches the structure of the answer.
#[derive(Serialize, Deserialize)]
struct DogApiResponse {
message: String,
status: String,
}

#[on_set_doc(collections = ["dogs"])]
async fn on_set_doc(context: OnSetDocContext) -> Result<(), String> {
// 1. Prepare the HTTP GET request
let url = "https://dog.ceo/api/breeds/image/random".to_string();

let request_headers = vec![];

let request = CanisterHttpRequestArgument {
url,
method: HttpMethod::GET,
body: None,
max_response_bytes: None,
// In this simple example we skip sanitizing the response with a custom function for simplicity reason.
transform: None,
// We do not require any particular HTTP headers in this example.
headers: request_headers,
};

// 2. Execute the HTTP request. A request consumes Cycles(!). In this example we provide 2_000_000_000 Cycles (= 0.002 TCycles).
// To estimate the costs see documentation:
// - https://internetcomputer.org/docs/current/developer-docs/gas-cost#special-features
// - https://internetcomputer.org/docs/current/developer-docs/integrations/https-outcalls/https-outcalls-how-it-works#pricing
// Total amount of cycles depends on the subnet size. Therefore, on mainnet it might cost ~13x more than what's required when developing locally. Source: https://forum.dfinity.org/t/http-outcalls-cycles/27439/4
// Note: In the future we will have a UI logging panel in console.juno.build to help debug on production. Follow PR https://github.com/junobuild/juno/issues/415.
//
// We rename ic_cdk::api::management_canister::http_request::http_request to http_request_outcall because the Satellite already includes such a function's name.
match http_request_outcall(request, 2_000_000_000).await {
Ok((response,)) => {
// 3. Use serde_json to transform the response to a structured object.
let str_body = String::from_utf8(response.body)
.expect("Transformed response is not UTF-8 encoded.");

let dog_response: DogApiResponse =
serde_json::from_str(&str_body).map_err(|e| e.to_string())?;

// 4. Our goal is to update the document in the Datastore with an update that contains the link to the image fetched from the API we just called.
let dog: DogData = DogData {
src: Some(dog_response.message),
};

// 5. We encode those data back to blob because the Datastore holds data as blob.
let encode_data = encode_doc_data(&dog)?;

// 6. Then we construct the parameters required to call the function that save the data in the Datastore.
let doc: SetDoc = SetDoc {
data: encode_data,
description: context.data.data.after.description,
updated_at: Some(context.data.data.after.updated_at),
};

// 7. We store the data in the Datastore for the same caller as the one who triggered the original on_set_doc, in the same collection with the same key as well.
set_doc_store(
context.caller,
context.data.collection,
context.data.key,
doc,
)?;

Ok(())
}
Err((r, m)) => {
let message =
format!("The http_request resulted into error. RejectionCode: {r:?}, Error: {m}");

Err(message)
}
}
}

This sample not only provides a practical demonstration of making HTTP outcalls but also illustrates the enhanced capabilities that serverless functions offer to developers using Juno.


Conclusion

In conclusion, Juno's serverless functions mark a significant advancement in blockchain development, offering developers the tools to create more sophisticated and dynamic applications. This feature set not only broadens the scope of what can be achieved within Juno's ecosystem but also underscores the platform's commitment to innovation and developer empowerment. As we move forward, the potential for serverless technology in blockchain applications is boundless, promising exciting new possibilities for the future.

👋


Stay connected with Juno by following us on X/Twitter.

Reach out on Discord or OpenChat for any questions.

⭐️⭐️⭐️ stars are also much appreciated: visit the GitHub repo and show your support!

Local development is here!

· 4 min read


Hello 👋,

I'm excited to share that local dApp development and end-to-end testing are now available on Juno through our new Docker image.

This update serves as a key addition to our upcoming features for the year to come, offering developers a practical solution to build or test their projects in a sandbox environment.

The documentation for this new feature is available here. Moreover, the container's code is open source, and you can access it here for more insights.

In this blog post, rather than reiterating the documentation, I'll provide an example to demonstrate how you can effectively utilize this feature in your development workflow.


Before you begin

Make sure you have Docker installed on your machine.


Clone the example

I've prepared a sample project to demonstrate how a dApp can be run and persist data in a local environment. Open your terminal and clone the sample project developed with Astro:

git clone https://github.com/junobuild/examples/
cd examples/astro
npm ci

Run the Docker Image

To start the container, head to the subfolder containing the configuration I prepared for you.

cd docker

In this folder, you will find two files. A docker-compose.yml file contains essential information for the image, such as the port and a volume. For more details, refer to the documentation.

docker-compose.yml
services:
juno-satellite:
image: junobuild/satellite:latest
ports:
- 5987:5987
volumes:
- astro_dapp:/juno/.juno
- ./juno.dev.json:/juno/juno.dev.json

volumes:
astro_dapp:

There's also a juno.dev.json file, which is designed to set up a collection once the Satellite is populated locally, similar to what you can do in Juno's administration console.

juno.dev.json
{
"satellite": {
"collections": {
"db": [
{
"collection": "counter",
"read": "managed",
"write": "managed",
"memory": "stable"
}
]
}
}
}

Given that everything is set for you, you can run the following command to start the container:

docker compose up

And that's it! The container is designed to manage serving a local Internet Computer replica. It also embeds a custom CLI which handles deploying and populating the Internet Identity and a Satellite. With this setup, you have everything necessary for efficient local development.


Run the dApp

To get the sample dApp up and running, open another terminal window. Navigate back to the root folder of the project and start the dApp using the following command:

npm run dev

This project leverages our Vite Plugin and libraries, streamlining the setup process with minimal configuration needed. I've already configured it for you, but typically, you would only need to set a container option for the plugin:

astro.config.js
import { defineConfig } from "astro/config";
import juno from "@junobuild/vite-plugin";

export default defineConfig({
vite: {
plugins: [
juno({
container: true
})
]
}
});

And pass along the environment variable to the initialization:

await initSatellite({
satelliteId: import.meta.env.PUBLIC_SATELLITE_ID,
container: import.meta.env.PUBLIC_CONTAINER
});

With the local dApp server active, you can now access it in your browser at http://localhost:4321.

Upon visiting the site, you'll find an option to sign in using Internet Identity. Since everything is deployed locally in a sandbox, your existing identity (anchor) won't be recognized, that's why you will have to create a new one.

A screenshot that showcases the sample dApp home screen

Once signed in, you'll see a "count" action, a simple feature that increments a counter and saves a value associated with your identity.

A screenshot that showcases the sample dApp once signed in

This demonstrates the dApp's capability to interact with local data and user identities.


Conclusion

In conclusion, the integration of local development capabilities with Juno, using Docker, marks a significant step forward in streamlining and simplifying the development process for dApps.

This setup not only facilitates a more efficient development cycle but also offers a practical environment for thorough testing. It's a straightforward, no-frills approach that underscores Juno's commitment to improving the developer experience without overcomplicating the process.

I am excited to see the innovative applications and solutions the developers of our community will create with these enhanced tools at their disposal.

👋


Stay connected with Juno by following us on X/Twitter.

Reach out on Discord or OpenChat for any questions.

⭐️⭐️⭐️ stars are also much appreciated: visit the GitHub repo and show your support!

Setting Up Your Internet Identity on internetcomputer.org

· 4 min read


Web 2.0 uses usernames and passwords for logging into websites, which isn't very secure, can be a hassle, and doesn't always keep your information private.

Internet Identity (II), on the other hand, is a better way to log in online. Instead of just usernames and passwords, it uses new technology like fingerprints or Face ID on your phone or special hardware devices to make sure it's really you when you log in.

This authentication provider is used by Juno to secure access to its administration console for developers.

While most decentralized applications on the Internet Computer use the default domain ic0.app for the registration process using Internet Identity (referred to as the "old domain" in this article), Juno defaults to the more recognizable, aesthetically pleasing and easy to remember domain internetcomputer.org.

However, there is a caveat to this choice. When you register with Internet Identity, it's tied to a specific domain. This means that if you have previously created an identity to access other decentralized apps on the Internet Computer, you may not be able to sign in to Juno's console seamlessly using the main "call to action". You won't be blocked from logging in; the login screen also supports the old domain. However, the option to use it is not as prominent.

That's why in this article, we will guide you through the process of ensuring your identity works seamlessly on both domains. By adding a passkey for the other domain, you will ensure that your identity is available for sign-in, regardless of those two choices.

note

In the following instructions, we assume that your identity works on identity.ic0.app, and we are demonstrating how to add it for identity.internetcomputer.org. Of course, this tutorial also applies in reverse; you can simply switch the domain while following these steps.


Step-by-Step Guide

Here are the steps to follow:

1. Sign-in Internet Identity

As a first step, you need to login into Internet Identity. Go to https://identity.ic0.app.

2. Add passkey

As we are looking to register a passkey for the other domain on your device, initiate the process by clicking "Add passkey".

Initiate add passkey screenshot

3. Copy the URL

Internet Identity will present you with various user-friendly options for registering a new passkey. While these options are handy if you plan to add an additional browser or device, for the purpose of this tutorial, our goals are different.

Therefore, please ignore the information on the screen and only copy the code that is presented to you.

Copy url screenshot

4. Navigate to modified URL

We are assuming that you want to register the other domain for the same browser. In that case, open a new tab and paste the URL you just copied but, before pasting the link, modify the domain part to point to the other domain.

For example, change a copied link from https://identity.ic0.app/?action=add-passkey&ii=2279219 to https://identity.internetcomputer.org/?action=add-passkey&ii=2279219 by replacing ic0.app with internetcomputer.org.

Note that along the way, you will be prompted to authenticate yourself with your authentication method, such as fingerprint or Face ID. This ensures a secure sign-in on the other domain as well.

Verify new passkey screenshot

5. Enter verification code

To validate the new passkey, you will be prompted to verify a code in the original tab where you initiated the creation of the new passkey.

Simply select and copy the verification code displayed on the screen.

Copy verification code screenshot

Return to the previous tab and enter the code. You can either manually type it or, once you've placed your cursor in the first digit field, paste the entire code (Ctrl|Cmd+V), which will be automatically filled.

Enter verification code screenshot

6. Confirmation

Congratulations, the passkey on the device you just used for this tutorial is now ready for both the old and other domain.

Success screenshot

7. Optionally, rename the new passkey

The new passkey will inherit a default name. Optionally, you can rename it to make it clear in the future which one is related to which domain. To do this, continue to Internet Identity, select "Rename", and follow the instructions provided.

Rename passkey screenshot


Conclusion

In this guide, we've walked you through the process of setting up your Internet Identity for another domain. We hope this has been helpful and will provide you with easy access to Juno's administration console and other dApps using multiple domains for sign-in with Internet Identity.

👋

Stay connected with Juno by following us on X/Twitter.

Reach out on Discord or OpenChat for any questions.

⭐️⭐️⭐️ stars are also much appreciated: visit the GitHub repo and show your support!

Introducing Juno Analytics - Unlock Deeper Insights with Privacy in Mind

· 3 min read


We're excited to introduce Juno Analytics, a simple, performant, and open-source web3 analytics solution designed with privacy in mind for the developers building decentralized dapps with Juno.

In a digital age where data privacy is paramount, Juno Analytics empowers you to gather valuable insights about your users while ensuring anonymity and respecting their privacy.

Here's a closer look at this powerful new feature:


Privacy-Friendly Analytics

Juno Analytics is part of our commitment to user privacy. It conducts measurements of your dapps and sites completely anonymously, without using cookies or collecting any personal data.

This means no more intrusive cookie banners, no persistent identifiers, no cross-site tracking, and no cross-device tracking.

Your analytics data remains solely focused on providing you valuable insights without any other ulterior motives.


Performance-Optimized Script

Our JavaScript library for gathering analytics is designed for peak performance. It consists of a minimal main script that seamlessly integrates with your application's user interface and a dedicated worker responsible for handling logic and cryptography.

This thoughtful design ensures that adding analytics won't slow down your application, even during boot time, preserving your customer acquisition rate.


Comprehensive Tracking

With Juno Analytics, you're not limited to just basic page views. You can gain deeper insights into your visitors by creating custom events to track conversions, attributions, and more. It's a powerful tool for optimizing your dapps and sites.


Fully Open Source

Juno is fully committed to the principles of open-source development. Unlike proprietary tools like Google Analytics, Juno Analytics is built with a commitment to transparency and freedom.


You Own Your Data

All data tracked by our analytics solution is securely stored on the blockchain. As with all our services, you have full control over your smart contracts, and your data remains exclusively yours.


Getting Started

To begin using Juno Analytics, please refer to our detailed documentation for step-by-step instructions.

It will guide you through the process of setting up and integrating Analytics into your websites and dapps. 🚀


Conclusion

We hope you're as excited about Juno Analytics as we are! This feature marks a significant stride toward a more privacy-conscious analytics solution and provide Juno's developers an additional feature in the eco-system to build awesome decentralized applications.

👋

Stay connected with Juno by following us on Twitter.

⭐️⭐️⭐️ stars are also much appreciated: visit the GitHub repo and show your support!