Google Sign-In Comes to Juno

You can now use your Google account to log into the Juno Console, and developers can add the same familiar login experience natively to the projects they are building.
Hey everyone 👋
Today marks quite a milestone and I'm excited to share that Google Sign-In is now live across the entire Juno ecosystem.
From my perspective, though time will tell, this update has the potential to be a real game changer. It brings what users expect: a familiar, secure, and frictionless authentication flow.
It might sound a bit ironic at first - we're integrating Google, after all - but I'm genuinely happy to ship this feature without compromising on the core values: providing developers secure features and modern tools with a state-of-the-art developer experience, while empowering them with full control over a cloud-native serverless infrastructure.
Let's see how it all comes together.
💡 Why It Matters
Authentication is one of those things every product needs but, it's complex, it touches security, and it's easy to get wrong.
Until now on Juno, developers could use Internet Identity, which has its strengths but also its weaknesses. It provides an unfamiliar login flow - is it an authentication provider or a password manager? - and it's not a well-known product outside of its niche.
Passkeys were also added recently, but you only have to scroll through tech Twitter to see that for every person who loves them, there's another who absolutely hates them.
That's why bringing native Google Sign-In to Juno matters. Developers can now offer their users a familiar, frictionless login flow - and let's be honest, most people are used to this signing and don't care much about doing it differently.
At the same time, this doesn't mean giving up control. The authentication process happens entirely within your Satellite, using the OpenID Connect standard.
You can obviously combine multiple sign-in methods in one project, offering your users the choice that best fits their needs.
When it comes to Juno itself, this also matters for two reasons: it potentially makes onboarding - through the Console - more accessible for web developers who don't care about decentralization but do care about owning their infrastructure ("self-hosting"). And it opens the door to future integrations with other providers. I still hope one day to have a better GitHub integration, and this might be a step toward it.
Long story short, it might look like a trivial change - just a couple of functions and a bit of configuration - but it's another step toward Juno's long-term goal of making it possible to build and scale modern cloud products without compromising on what matters most: empowering developers and their users.
⚙️ How It Works
When a user signs in with Google, Juno follows the OpenID Connect (OIDC) standard to keep everything secure and verifiable.
- The user signs in with Google.
- Google verifies their credentials and issues a signed OpenID Connect token.
- After redirecting to your app, that signed token (JWT) is sent to your Satellite.
- Inside the container, the token and its signature are verified, and the user's information (such as email or profile) is extracted.
- The Satellite then creates a secure session for the user.
- Once authenticated, the user can start interacting with your app built on top of your container's features.
🧩 Infrastructure
At this point, you get the idea: aside from using Google as a third-party provider, there's no hidden “big tech” backend behind this. Everything else happens within your Satellite.
The credentials you configure - your Google project and OAuth 2.0 Client ID - are yours. In comparison, those used in Internet Identity are owned by the DFINITY Foundation. So, this approach might feel less empowering for end users or more empowering for developers. You can see the glass half full or half empty here.
To validate tokens on the backend, your container needs access to the public keys Google uses to sign them. Since those keys rotate frequently, fetching them directly would introduce extra cost and resource overhead.
That's why the Observatory - a shared module owned by Juno (well, by me) - comes in. It caches and provides Google's public keys, keeping verification fast, efficient, and cost-effective.
Because Juno is modular, developers who want full control or higher redundancy can run their own Observatory instance. Reach out if you're interested.
🪄 Setup Overview
Getting started only takes a short configuration. Once your Google project is set up, add your Client ID to your juno.config file:
import { defineConfig } from "@junobuild/config";

export default defineConfig({
  satellite: {
    ids: {
      development: "<DEV_SATELLITE_ID>",
      production: "<PROD_SATELLITE_ID>"
    },
    source: "dist",
    authentication: {
      google: {
        clientId: "1234567890-abcde12345fghijklmno.apps.googleusercontent.com"
      }
    }
  }
});
Then apply it using the CLI or manually through the Console UI. That's it, it's configured.
🧑💻 Usage
To add the sign-in to your app, it only takes a single function call - typically tied to a button like "Continue with Google".
import { signIn } from "@junobuild/core";

await signIn({ google: {} });
For now, it uses the standard redirect flow, meaning users are sent to Google and then redirected back to your app.
You'll just need to handle that callback on the redirect route with:
import { handleRedirectCallback } from "@junobuild/core";

await handleRedirectCallback();
I'll soon unleash support for FedCM (Federated Credential Management) as well.
Aside from that, nothing new - the rest works exactly the same.
Regardless of which authentication provider you're using, you can still track a user's authentication state through a simple callback:
import { onAuthStateChange } from "@junobuild/core";

onAuthStateChange((user: User | null) => {
  console.log("User:", user);
});
And because type safety is the way, you can now safely access provider-specific data without writing endless if statements:
import { isWebAuthnUser, isGoogleUser } from "@junobuild/core";

if (isWebAuthnUser(user)) {
  console.log(user.data.providerData.aaguid); // Safely typed ✅
}

if (isGoogleUser(user)) {
  console.log(user.data.providerData.email); // Safely typed ✅
}
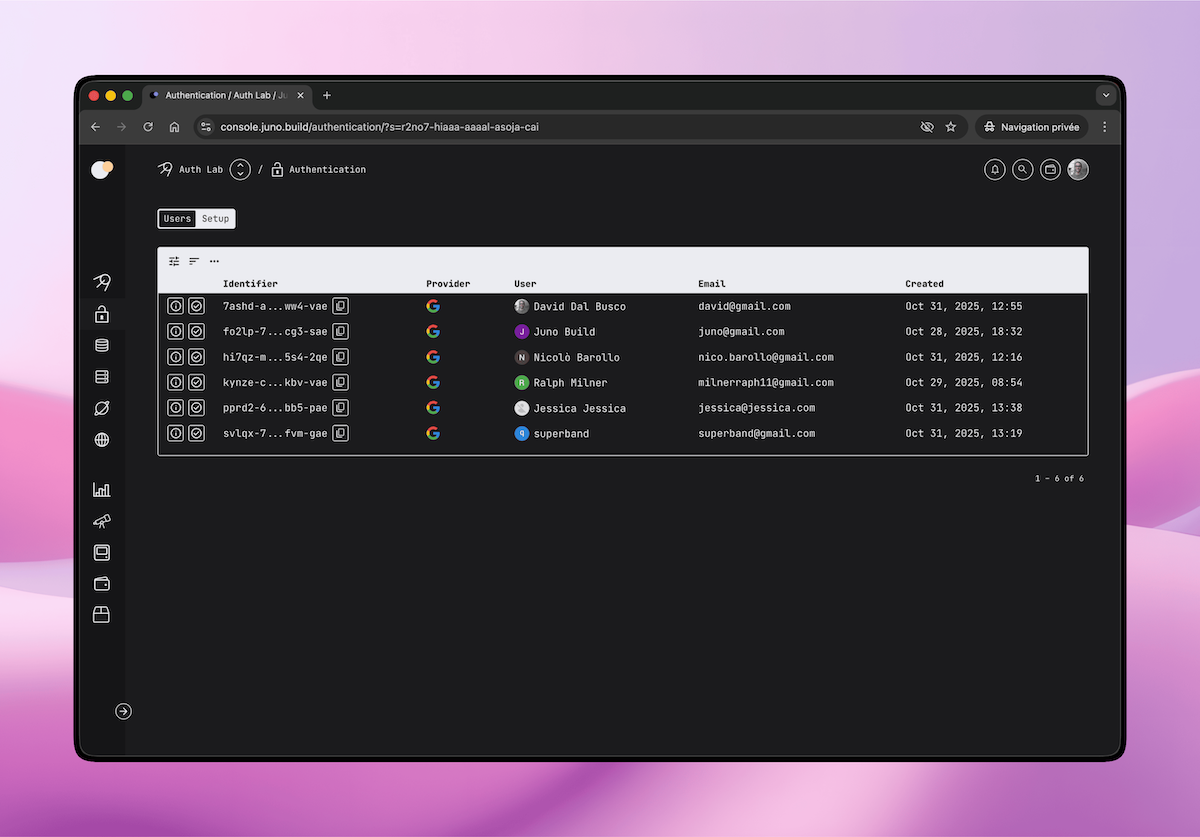
🛠️ Managing Users
Once users start signing in, you can view and manage them directly in the Authentication section of the Console.
Each user entry displays key details such as:
- Name and email address
- Authentication provider
- Profile picture (if available)
This view also lets you filter, sort, refresh or ban users etc.
📚 Learn More
You can find all the details - including setup, configuration, and advanced options - in the documentation:
If you haven't tried Juno yet, head over to console.juno.build and sign in with Google to get started.
Ultimately, I can tell you stories, but nothing beats trying it yourself.
To infinity and beyond,
David
Reach out on Discord or OpenChat for any questions.
Stay connected with Juno on X/Twitter.
⭐️⭐️⭐️ stars are also much appreciated: visit the GitHub repo and show your support!