This release focuses on frontend changes in the Console:
You can now label your Satellites with environment flags and tags. These appear in the launchpad, switcher, and overview. On the launchpad, they can also be used as search filters to quickly find the right Satellite.
A new navigation feature – called “Spotlight” or “Quick Access” – lets you jump anywhere in the Console or run actions (such as changing the theme) in seconds. Open it with the search icon in the navbar or by pressing Ctrl/Cmd + K.
Hopefully these make building with the Console a little more fun (and faster)!
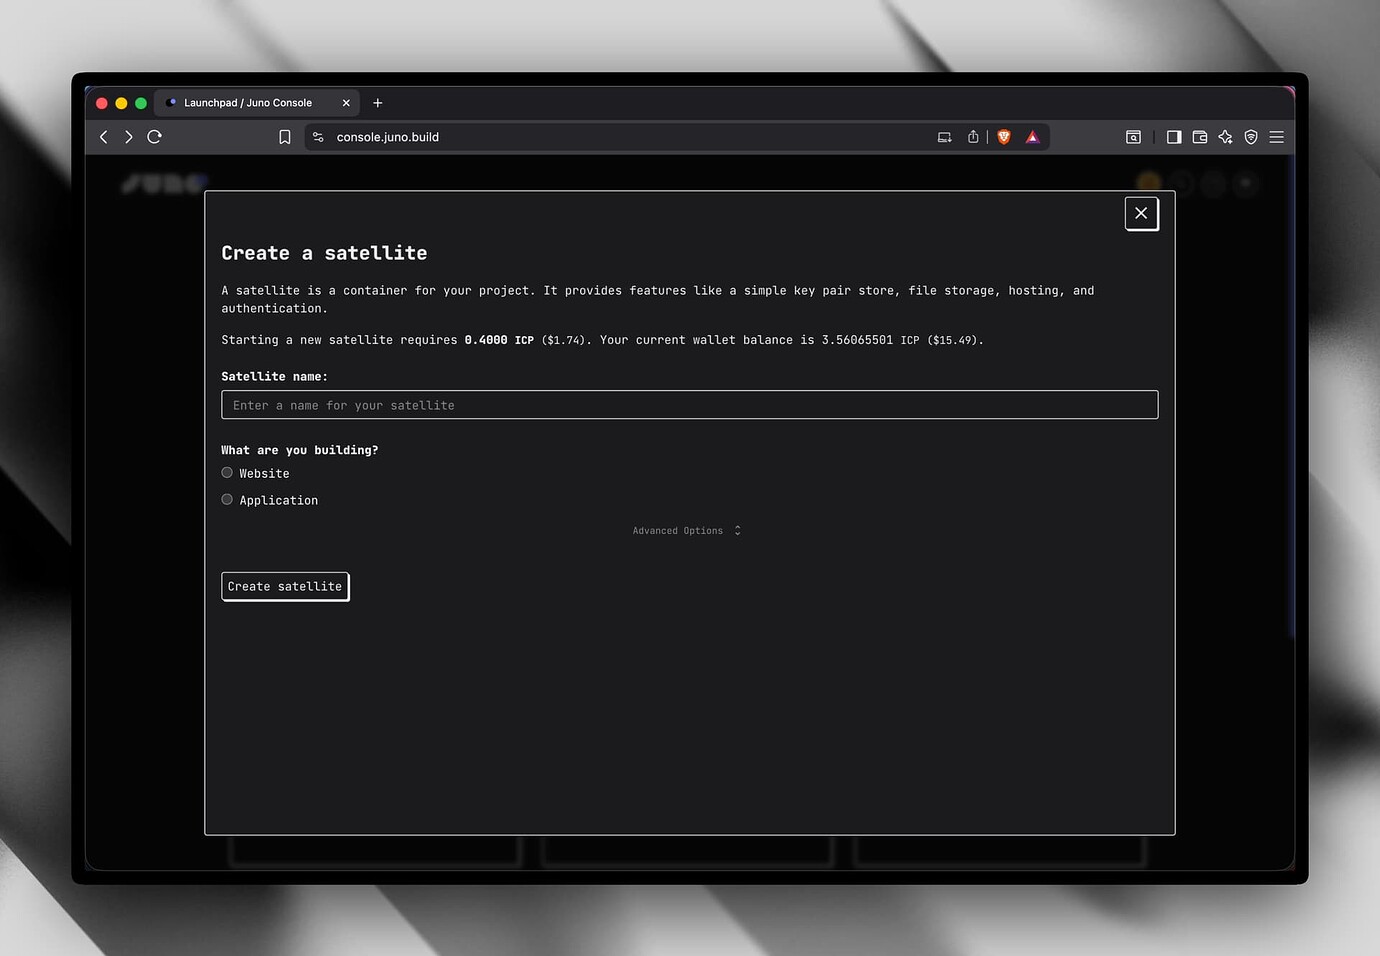
Authentication is a core part of building any app. Until now, developers on Juno have relied on third-party providers like Internet Identity and NFID. Today we're providing a new option: Passkeys.
This new authentication option is available to all developers using the latest Juno SDK and requires the most recent version of your Satellite containers. You can now enable Passkeys alongside existing providers, and the JavaScript SDK has been updated to make authentication APIs more consistent across sign-in, sign-out, and session management.
Passkeys are a passwordless authentication method built into modern devices and browsers. They let users sign up and sign in using secure digital keys stored in iCloud Keychain, Google Password Manager, or directly in the browser with Face ID, Touch ID, or a simple device unlock instead of a password.
Under the hood, Passkeys rely on the WebAuthn standard and the web API that enables browsers and devices to create and use cryptographic credentials. Passkeys are essentially a user-friendly layer on top of WebAuthn.
When stored in a password manager like iCloud Keychain or Google Password Manager, passkeys sync across a user’s devices, making them more resilient, though this does require trusting the companies that provide those services. If stored only in the browser, however, they can be lost if the browser is reset or uninstalled.
The good news is that most modern platforms already encourage syncing passkeys across devices, which makes them convenient for everyday use, giving users a smooth and safe way to log into applications.
Each authentication method has its strengths and weaknesses. Passkeys provide a familiar, device-native login experience with Face ID, Touch ID, or device unlock, relying on either the browser or a password manager for persistence. Internet Identity and NFID, on the other hand, offer privacy-preserving flows aligned with the Internet Computer, but they are less familiar to mainstream users and involve switching context into a separate window.
In practice, many developers will probably combine Passkeys and Internet Identity side by side, as we do in the starter templates we provide.
Ultimately, the right choice depends on your audience and product goals, balancing usability, privacy, and ecosystem integration.
As you can notice, unlike with existing third-party providers, using Passkeys requires a distinct sign-up and sign-in flow. This is because the WebAuthn standard is designed so that an app cannot know in advance whether the user has an existing passkey, and this is intentional for privacy reasons. Users must therefore explicitly follow either the sign-up or sign-in path.
It is also worth noting that during sign-up, the user will be asked to use their authenticator twice:
once to create the passkey on their device
and once again to sign the session that can be used to interact with your Satellite.
Given these multiple steps, we added an onProgress callback to the various flows. This allows you to hook into the progression and update your UI, for example to show a loading state or step indicators while the user completes the flow.
import{ signUp }from"@junobuild/core"; awaitsignUp({ webauthn:{ options:{ onProgress:({ step, state })=>{ // You could update your UI here console.log("Progress:", step, state); } } } });
Previously, calling signIn() without arguments defaulted to Internet Identity. With the introduction of Passkeys, we decided to drop the default. From now on, you must explicitly specify which provider to use for each sign-in call. This makes the API more predictable and avoids hidden assumptions.
In earlier versions, providers could also be passed as class objects. To prevent inconsistencies and align with the variant pattern used across our tooling, providers (and their options) must now be passed through an object.
By default, calling signOut will automatically reload the page (window.location.reload) after a successful logout. This is a common pattern in sign-out flows that ensures the application restarts from a clean state.
If you wish to opt out, the library still clears its internal state and authentication before the reload, and you can use the windowReload option set to false:
To make the API more consistent with the industry standards, we introduced a new method called onAuthStateChange. It replaces authSubscribe, which is now marked as deprecated but will continue to work for the time being.
The behavior remains the same: you can reactively track when a user signs in or out, and unsubscribe when you no longer need updates.
Passkeys are now available, alongside updates to the authentication JS APIs. With passwordless sign-up and sign-in built into modern devices, your users get a smoother experience.
Check out the updated documentation for details on:
Let me know if anything looks fishy — and happy coding! 👨🔧
🖥️ Two screenshots from the Console new features
The new “Notifications” component:
The overall look: collapsible menu, redesigned tabs, more prominent actions, and more.
As a side note on this release: aside from the custom domain feature, I think it’s now possible to configure your entire project — including authentication, data, storage, and emulator — directly within the Juno config file. Plus with type safety as the cherry on top.
This is especially handy for maintainability or if your project can be forked.
Here’s an example config that shows where and how the project is deployed, which headers to apply to assets, defines the structure of that data, and which image to use when running the emulator with Podman:
One of the principles that shaped Juno from day one was the idea of building apps with full ownership — no hidden infrastructure, no opaque servers.
No hypocrisy either.
If developers are encouraged to deploy code in containers they control, it feels inconsistent to rely on centralized infrastructure — like AWS or other Web2 cloud providers — to manage deployment pipelines or run the platform. With the exception of email notifications, Juno currently runs entirely on the Internet Computer — and that's a deliberate choice.
That doesn't mean being stubborn for the sake of it. It just means trying to push things forward without falling back on the old way unless absolutely necessary.
At the same time, developer experience matters — a lot. It shouldn't take a degree in DevOps to ship a backend function. Developers who would typically reach for a serverless option should be able to do so here too. And for those who prefer to stay local, it shouldn't feel like a downgrade — no one should be forced into CI automation if they don't want to.
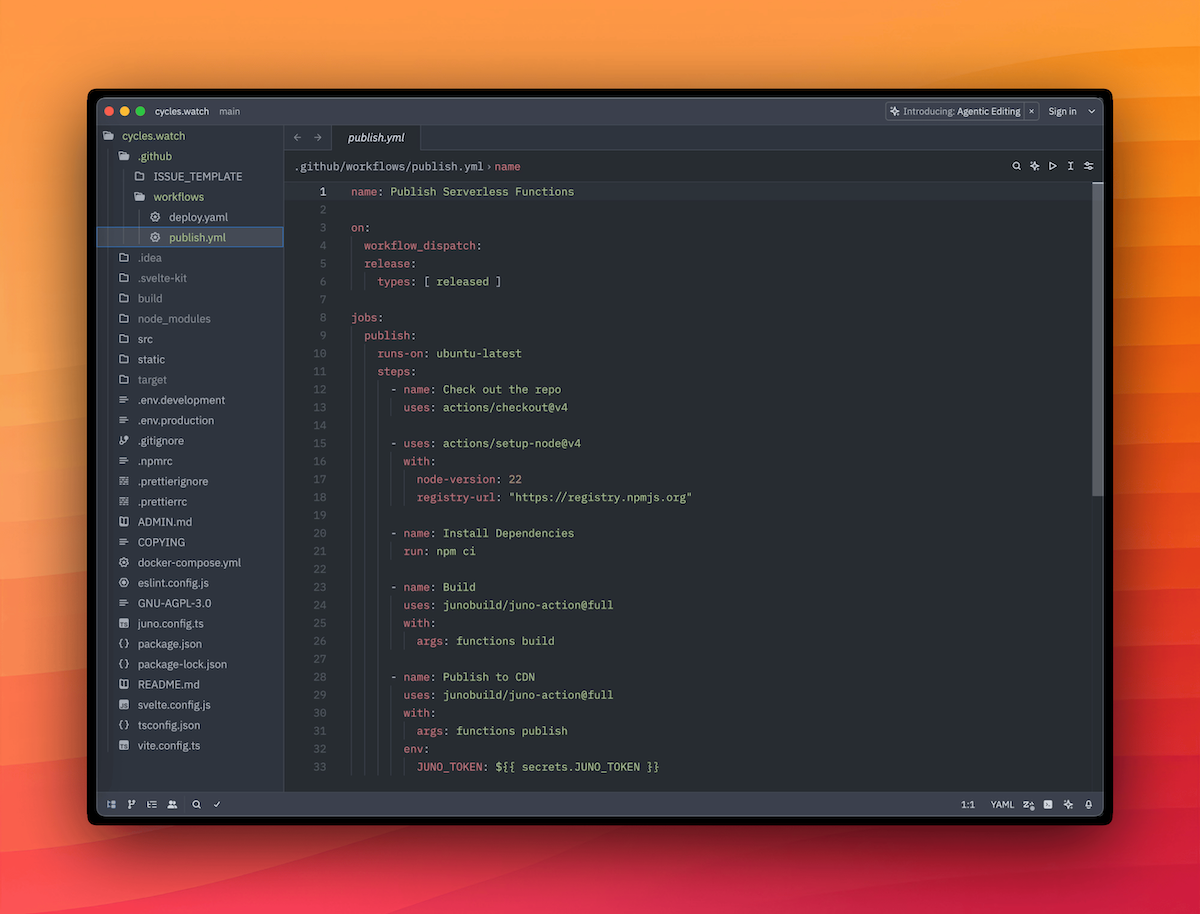
That's why the new GitHub Actions for serverless functions are now generally available — for those who want automation, not obligation.
Build serverless functions written in TypeScript or Rust
Automatically publish them to a Satellite
Optionally propose or directly apply upgrades
All within a GitHub Actions workflow. No manual builds, no extra setup — just code, commit, and push.
This makes it easier to fit Juno into an existing CI/CD pipeline or start a new one from scratch. The logic is bundled, metadata is embedded, and the container is ready to run.
You might ask yourself: "But what about the risk of giving CI full control over my infrastructure?"
That's where the improved access key (previously named "Controllers") roles come in.
Instead of handing over the master key, you give CI just enough access to do its job — and nothing more.
Here's how the roles break down in plain terms:
Administrator – Full control. Can deploy, upgrade, stop, or delete any module. Powerful, but risky for automation. Might be useful if you're spinning up test environments frequently.
Editor (Write) – Ideal for CI pipelines that deploy frontend assets or publish serverless functions. Can't upgrade those or stop and delete modules. A good default.
Submitter 🆕 – The safest option. Can propose changes but not apply them. Someone still needs to review and approve in the Console or CLI. No surprises, no accidents.
Use Editor for most CI tasks — it gives you automation without opening the blast radius.
Prefer an extra layer of review? Go with Submitter and keep a human in the loop.
Nothing changes in the approach for developers who prefer local development. The CLI remains a first-class tool for building and deploying.
All the new capabilities — from publishing functions to proposing or applying upgrades — are available not just in GitHub Actions or the Console UI, but also fully supported in the CLI.
In fact, the CLI has been improved with a neat addition: you can now append --mode development to interact with the emulator. This allows you to fully mimic production behavior while developing locally. And of course, you can also use any mode to target any environment.
juno functions upgrade --mode staging
juno deploy --mode development
While building serverless functions was never an issue, enabling GitHub Actions to publish and deploy without giving away full control introduced a challenge. How do you let CI push code without handing it the keys to everything?
That's where the idea of a sort of CDN came in.
Each Satellite now has a reserved collection called #_juno/releases. It's like a staging area where CI can submit new WASM containers or frontend assets. If the access key has enough privileges, the submission is deployed right away. If not, it's stored as a pending change — waiting for someone to approve it manually via the Console or CLI.
This builds on the change-based workflow that was added to the Console last year. Funny enough, it brought the Console so close to being a Satellite itself that it became... basically a meta example of what you can build with Juno.
And here's the cherry on top: because there's now a CDN tracking versions, developers can rollback or switch between different function versions more easily. A new CDN tab in the Console UI (under Functions) gives you access to all past versions and history.
Frontend deployment now benefits from the same change-based workflow. By default, when you run juno deploy or trigger a GitHub Action, the assets are submitted as pending changes — and applied automatically (if the access key allows it).
Want to skip that workflow? You still can. The immediate deployment path remains available — handy if something fails, or if you just prefer to keep things simple.
That's because the GitHub Action now comes in two flavors:
junobuild/juno-action or junobuild/juno-action@slim – perfect for common use cases like deploying frontend assets or running simpler CLI tasks. No serverless build dependencies included, so it's faster and more "lightweight" (relatively, it still uses Docker underneath...).
junobuild/juno-action@full – includes everything you need to build and publish serverless functions, with Rust and TypeScript support. It's heavier, but it does the job end to end.
This release isn't just about smoother deployments — it's a step toward making Juno feel like real infrastructure. Though, what is “real infrastructure” anyway? Whatever it is, this one doesn't come with the usual baggage.
Developers get to choose how they ship — locally or through CI. They get to decide what gets deployed and who can do it. They're not forced to rely on some big tech platform for their infra if they don't want to. And thanks to the new CDN and access control model, fast iteration and tight control can finally go hand in hand.
If you've been waiting for a way to ship backend logic without giving up on decentralization — or if you just like things working smoothly — this one's for you.
Go ahead.
Build it.
Push it.
Submit it.
Ship it.
To infinity and beyond,
David
Stay connected with Juno by following us on X/Twitter.
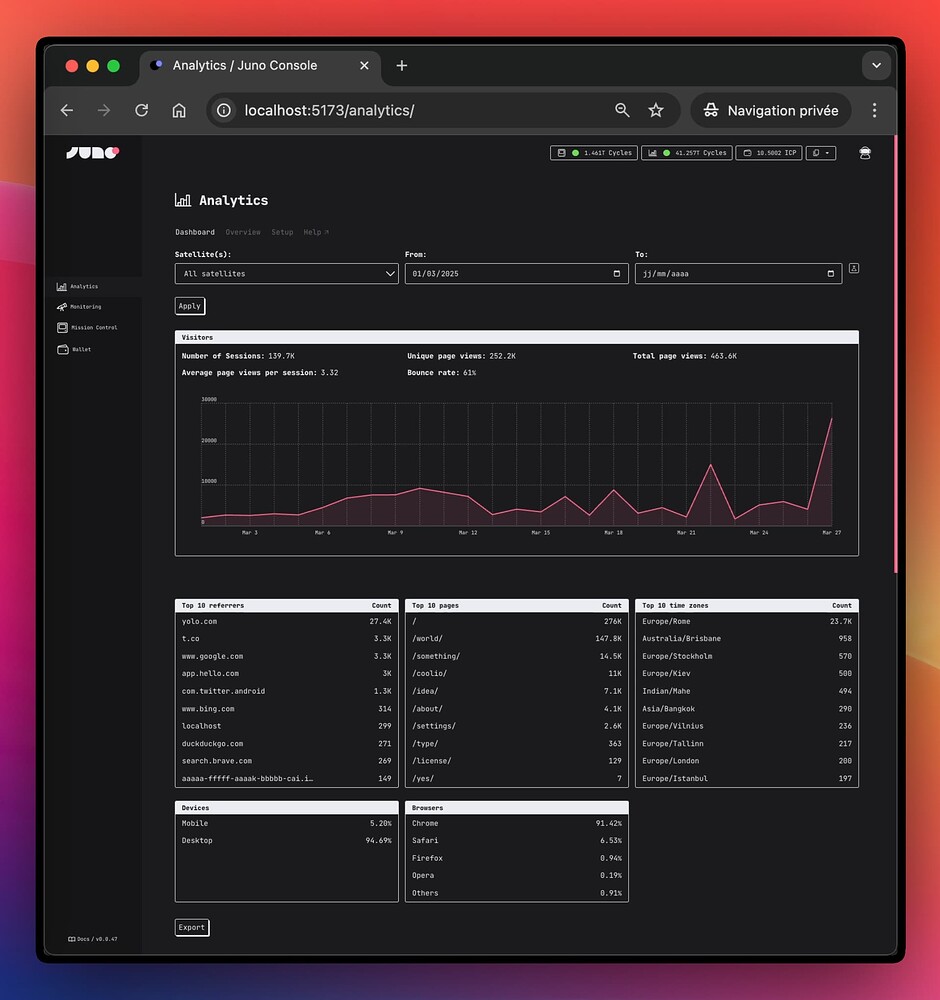
This one brings two improvements to the Analytics:
📣 Campaign tracking is now supported! Just use standard UTM tags in your links — traffic sources like newsletters, ads, and social posts will show up directly in your dashboard. No extra setup needed.
# For example
https://myapp.com/?utm_source=newsletter&utm_medium=email&utm_campaign=spring-launch
🤖 Bot detection has also been improved by using HTTP headers directly from the container smart contract (instead of those passed in the requests). More accurate and secure that way.
This new release brings a major upgrade to Juno Analytics — now powered by native HTTP requests with no more web workers or IndexedDB.
The JS client is now over 90% (🔥) smaller (just 3KB gzipped!), and the dashboard supports paginated views, top time zones, and OS metrics.
There are a few breaking changes (‼️), so check the notes if you’re using analytics — and make sure to upgrade your Orbiter and JS libraries at the same time ⚠️.