Local Development
Juno offers something most platforms don't: a full local development environment that closely mirrors production.
TL;DR
| What | How |
|---|---|
| Runtime supported | Docker or Podman |
| Start emulator | juno emulator start |
| Stop emulator | juno emulator stop |
| Console UI URL | http://localhost:5866 |
What the Emulator Includes
When you develop locally, you're running an emulator that includes the well known infrastructure services — including the actual administration Console UI.
This enables:
- A development experience that mirrors mainnet, helping you build with confidence
- A smooth dev loop, from prototype to deployment
- A unique way to build, debug, and validate serverless functions logic and frontend behavior — all in one place

Before you begin
The emulator is a self-contained local environment that runs in a container managed entirely by Juno — using either Docker or Podman under the hood.
Make sure your preferred runtime is installed on your machine:
For MacBooks with M-series processors, if you aim to use Docker, it is important to install Docker Desktop version 4.25.0 or later, ideally the latest available version.
For Podman, we are not aware of any particular version requirements at this time.
Getting Started
To run the emulator for local development, you need to have the Juno CLI installed.
If you haven't installed it yet, run:
- npm
- yarn
- pnpm
npm i -g @junobuild/cli
yarn global add @junobuild/cli
pnpm add -g @junobuild/cli
Then, in your project folder, start the local emulator with:
juno emulator start
This will launch the emulator along with all the services needed to develop your project.
We recommend running this in a dedicated terminal window or tab, while your frontend project (e.g. using Vite or Next.js) runs separately using npm run dev or similar.
To stop the emulator, run:
juno emulator stop
While you could technically start the emulator using docker run or podman run, we recommend using the Juno CLI to manage the emulator lifecycle. It handles important checks, sets the correct configuration, and ensures everything runs as expected.
Available Images
Juno provides two local environments. Most developers should start with Skylab, but Satellite is available for advanced or specialized workflows.
🧪 Skylab: Full Local Stack (Recommended)
The junobuild/skylab image is the default and recommended environment. It mirrors the production stack and includes everything needed for end-to-end development.
Use it for the full experience, including the Console UI and supporting infrastructure.
⚙️ Satellite: Minimal Setup
The junobuild/satellite image is a lightweight alternative that runs a single Satellite. It skips the Console UI and supporting infrastructure.
Use it when you need a faster, minimal setup focused on CI pipelines or automated testing.
The default (auto-deployed) Satellite is available with a predefined canister ID jx5yt-yyaaa-aaaal-abzbq-cai.
📊 Feature Comparison
The table below shows which modules are available in each image and helps clarify what's included when running locally with Skylab or Satellite.
| Module | Skylab | Satellite |
|---|---|---|
| Console (Backend) | ✅ | ❌ |
| Console (UI) | ✅ | ❌ |
| Create Satellites / Orbiters via Console UI | ✅ | ❌ |
| Default (auto-deployed) Satellite | ❌ | ✅ |
| Observatory | ✅ | ❌ |
Likewise, not all services are mounted by default - but they can be turned on (or off).
| Service | Skylab | Satellite |
|---|---|---|
| Internet Identity | ✅ | ✅ |
| ICP Ledger | ✅ | ✅ |
| ICP Index | ✅ | ✅ |
| NNS Governance | ✅ | ➖ |
| Cycles Minting (CMC) | ✅ | ➖ |
| Cycles Ledger | ✅ | ➖ |
| Cycles Index | ✅ | ➖ |
| Registry | ➖ | ➖ |
| SNS | ➖ | ➖ |
| NNS-dapp | ➖ | ➖ |
Console UI
When using the junobuild/skylab image, the Console UI becomes available by default at:
http://localhost:5866/
Once the emulator is running (juno emulator start), visit this URL in your browser to explore the Console — where you can create and manage Satellites, and explore features like Datastore, Authentication, Storage, and more.
Hot Reload
The local container supports live reloading. When you modify your configuration or build custom Functions to enhance Juno's capabilities with serverless features, those changes will be automatically redeployed.
Configuration Options
To customize the behavior of the local emulator—such as changing ports, setting a persistent volume name, or overriding the runner image — refer to the Emulator Configuration section.
There you'll find detailed information about available options including:
- ⚙️ Runner settings (e.g. image, platform, volume)
- 🔌 Custom port mappings
- 📁 Shared folders and hot reloading
- 🧪 CI and test environment tips
Usage
During local development - npm run dev - your app connects to the local emulator (container) by default — no extra configuration needed.
Automatic Configuration (Recommended)
The recommended way to connect your app to the local container run in the emulator or any environment is by using the plugins.
They automatically resolve the Satellite ID and other environment variables and handle initialization for you.
Manual Initialization
If you're not using a plugin and are initializing Juno manually, here's how to configure it to use the local container:
import { initSatellite } from "@junobuild/core";

const container = import.meta.env.DEV === true;

await initSatellite({
  satelliteId: container
    ? "jx5yt-yyaaa-aaaal-abzbq-cai"
    : "aaaaa-bbbbb-ccccc-ddddd-cai",
  container
});
Opt-out
The SDK automatically uses the emulator in local development. If you want to disable that behavior and connect directly to a remote canister (e.g. in CI or production testing), you can do:
await initSatellite({
  satelliteId: "aaaaa-bbbbb-ccccc-ddddd-cai",
  container: false
});
Administration
The admin server running on port 5999 provides a variety of internal management. Below are some tips and example scripts to make use of this little server.
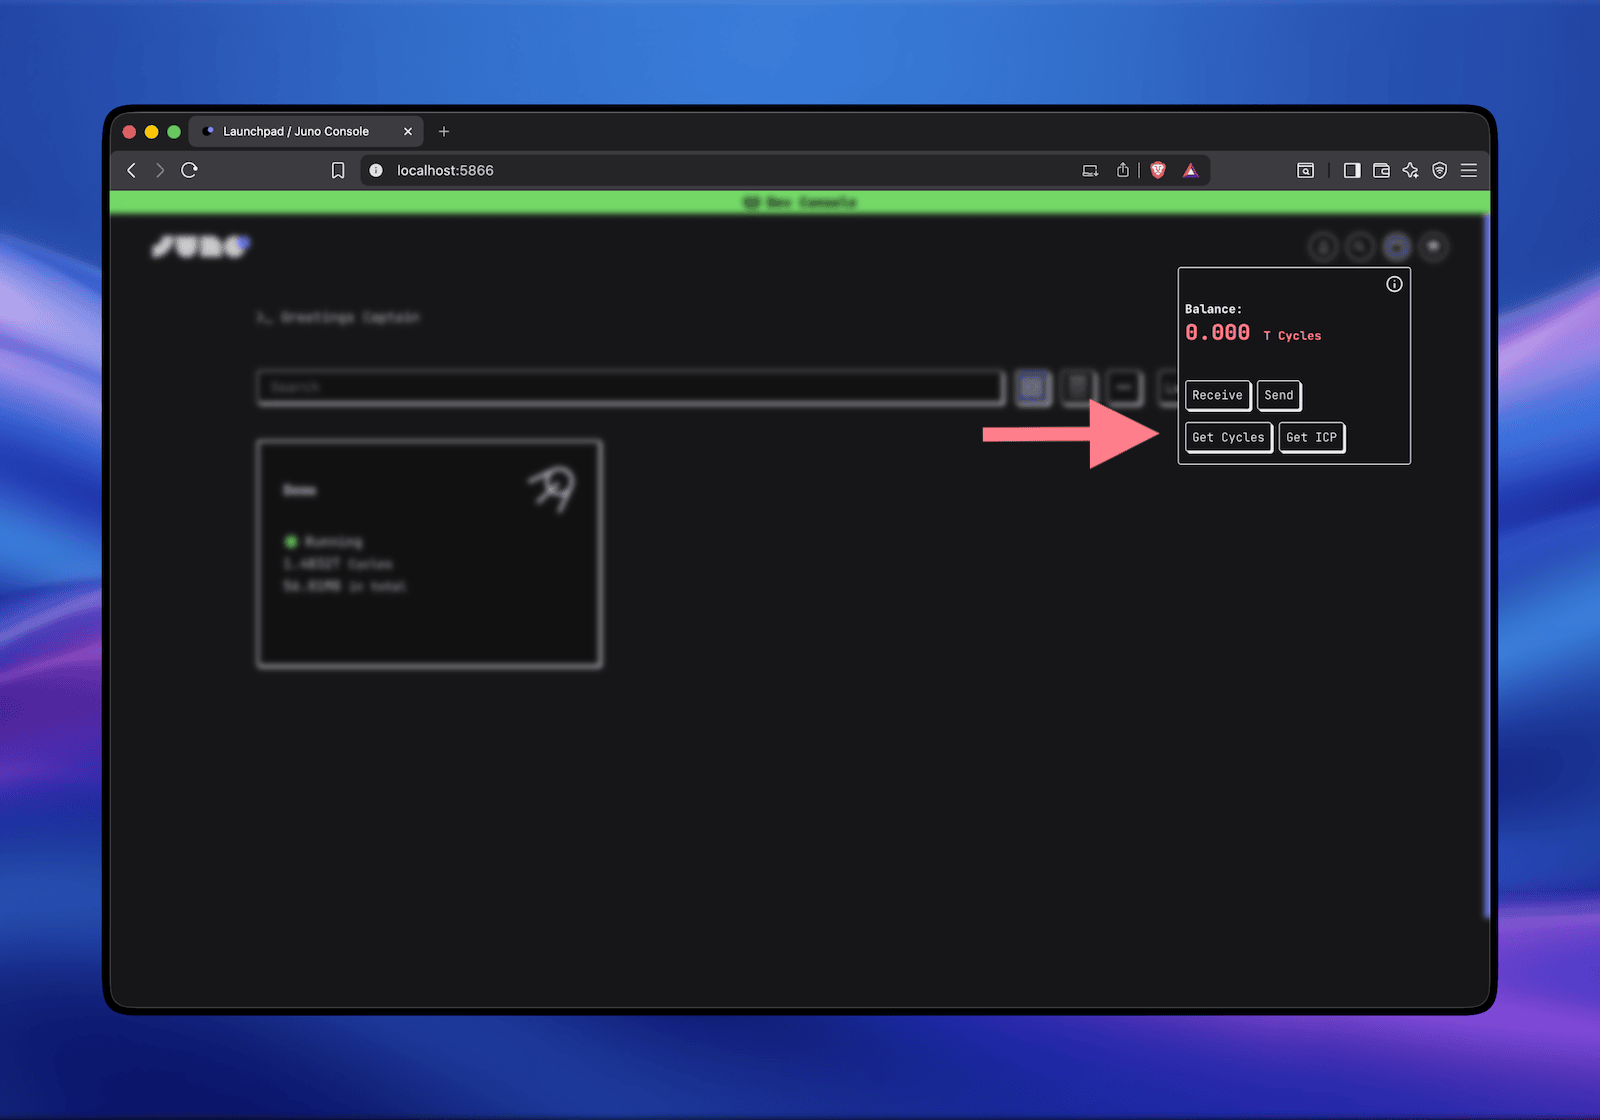
Get Cycles
If you're using the full environment, the Console UI includes a "Get Cycles" button in the wallet. It's a quick way to get Cycles out of the box.
You might want to transfer some Cycles from the ledger to a specified principal, which can be particularly useful when you're just getting started developing your app and no users currently own Cycles. This can be achieved by querying:
http://localhost:5999/ledger/transfer/?to=$PRINCIPAL&ledgerId=um5iw-rqaaa-aaaaq-qaaba-cai&amount330000000000000
For example, you can use the following script:
#!/usr/bin/env bash

# Check if a principal is passed as an argument; otherwise, prompt for it
if [ -z "$1" ]; then
  read -r -p "Enter the Wallet ID (owner account, principal): " PRINCIPAL
else
  PRINCIPAL=$1
fi

# Make a transfer request to the admin server
curl "http://localhost:5999/ledger/transfer/?to=$PRINCIPAL"